
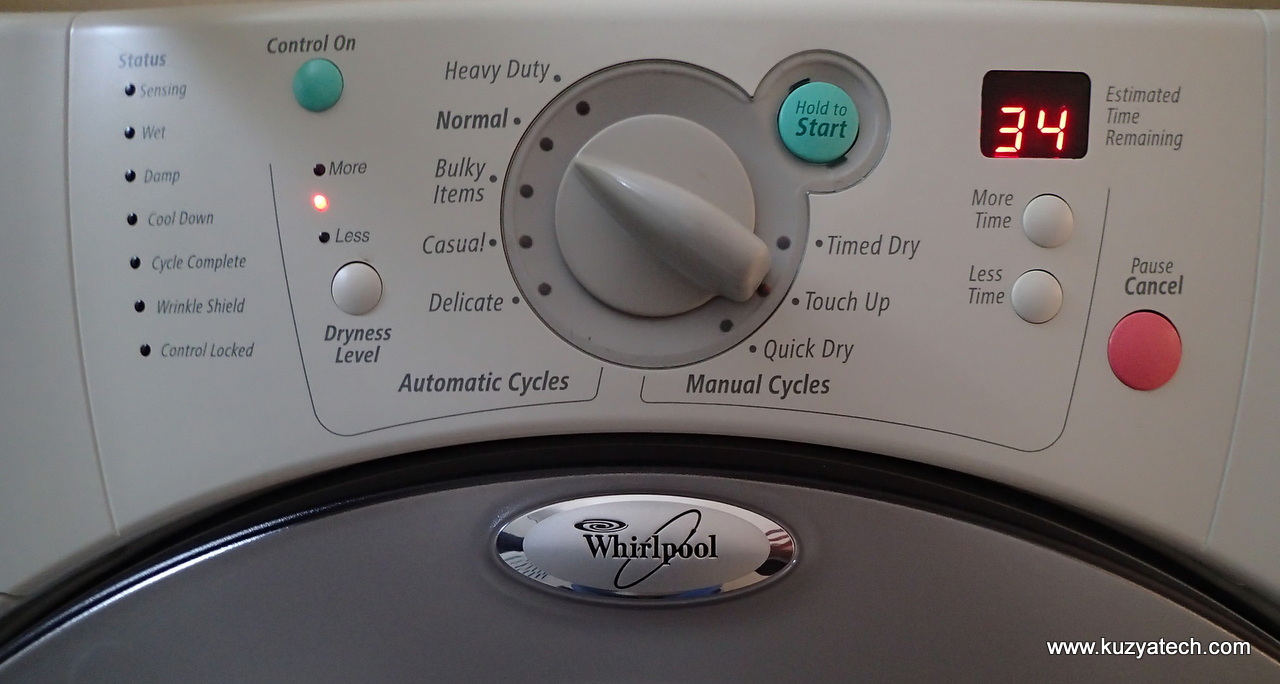
It’s been a while since we’ve fixed anything. But no worries- something always breaks around here! Lately, our fancy electrical dryer decided to call it quits.
The symptoms were typical and described all over the net: no response to the power-on button, a few LEDs glowing faintly and interior bulb turning on with the door open. Occasionally, I could also get things to start by flipping the dryer breaker off and letting it sit for a few days. Yeah, very popular with SWMBO. The solutions were all over the place too and mainly suggested replacing either the control board ($250), user interface panel ($145) or a thermal fuse $12). Problem is, you need to know which one you actually need first and that requires debugging.
Taking off the kick panel yielded a baggie with a service manual and schematic in it- very handy. Thermal fuse turned out to be perfectly fine though. Oh well.
So now we are down to the electronics.
Taking the unit apart turned out to be very easy- take three screws out on the back, slide the top cover off, then the control board is on the left, easily accessible. Looking at the schematic, not much can prevent things from turning on.
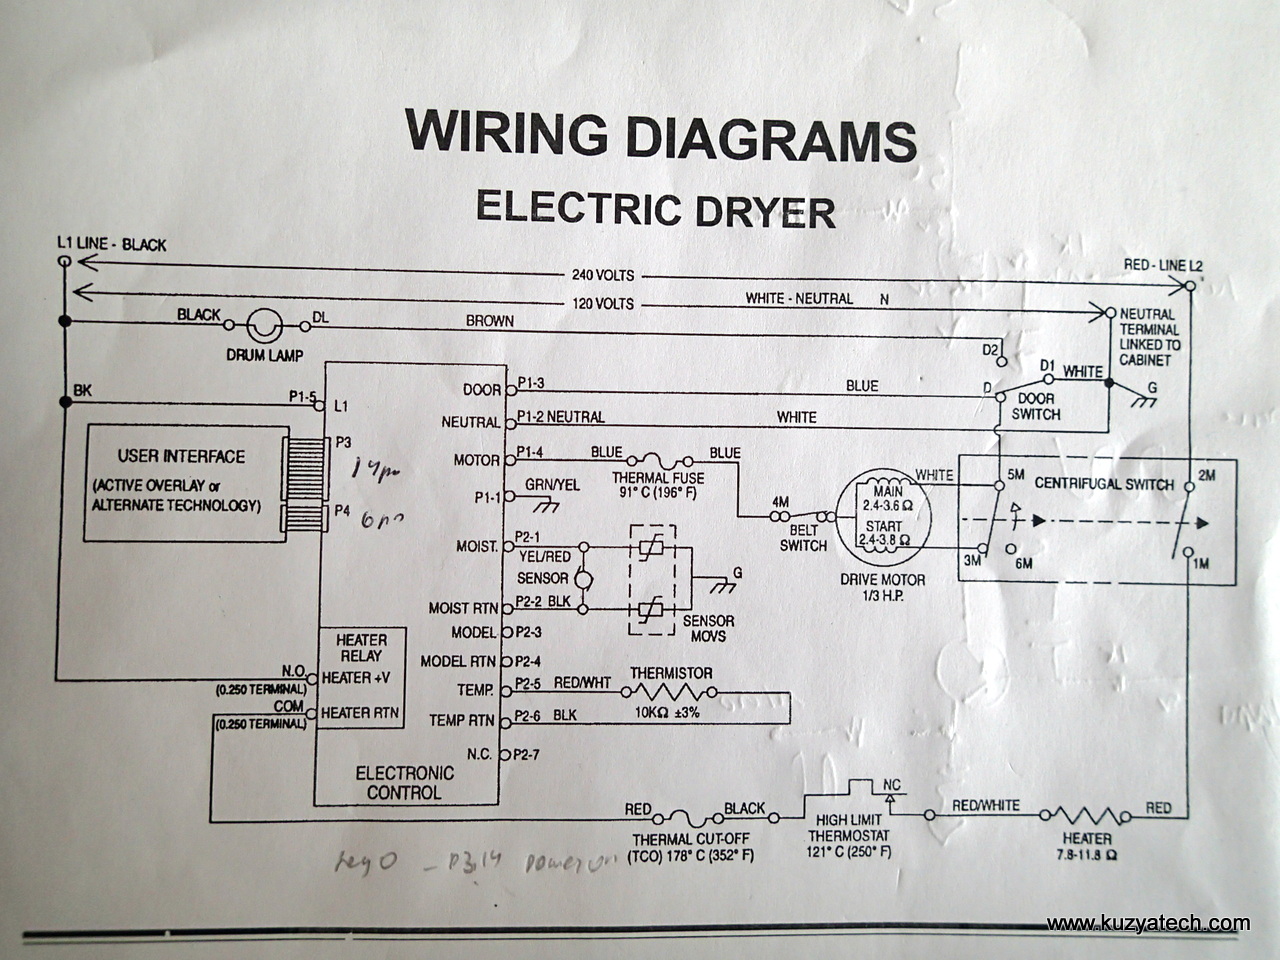
Dryer schematic
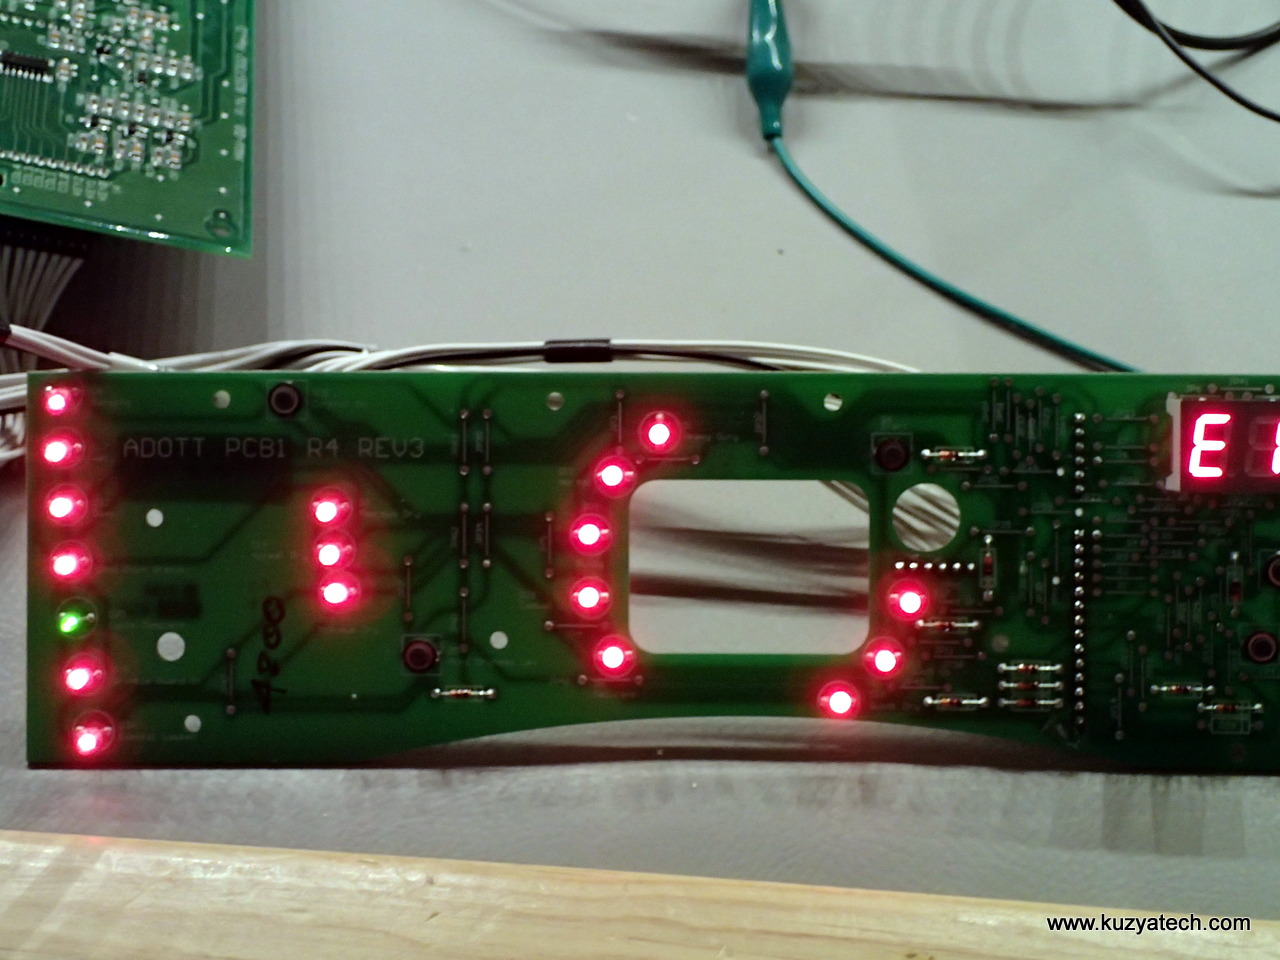
The lamp being on indicates we have 120V present. Checking on the terminals at the control board confirmed that as well. So it is now down to either that board or the user interface one. I removed both (it takes a few screws and disconnecting several connectors) and set them up on the bench to debug. Luckily I’ve been able to make it fail on the bench- very important step in any debug:

All the controls on my bench- much more convenient and no sharp metal around
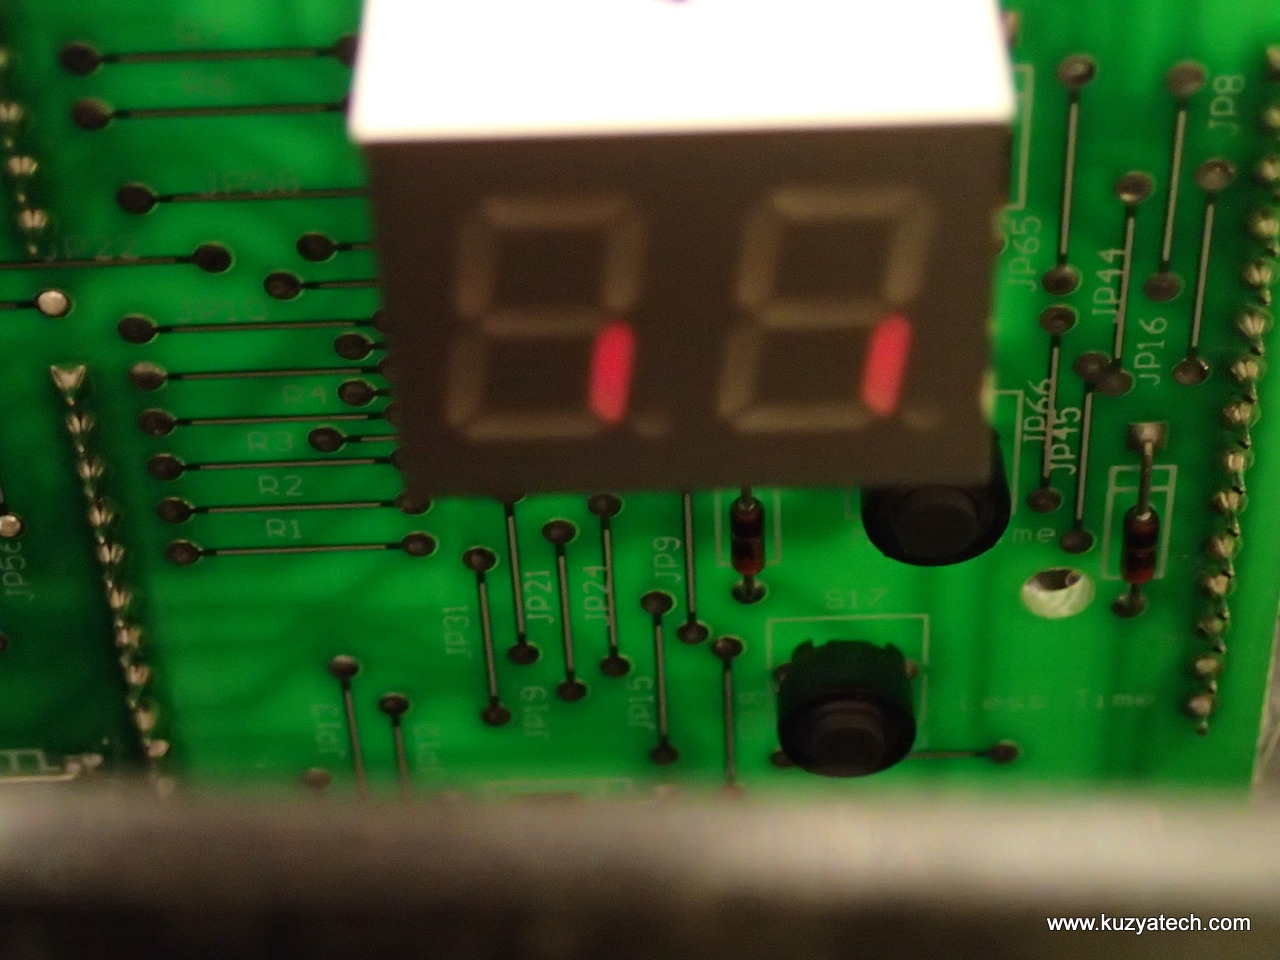
Barely glowing 7 segment
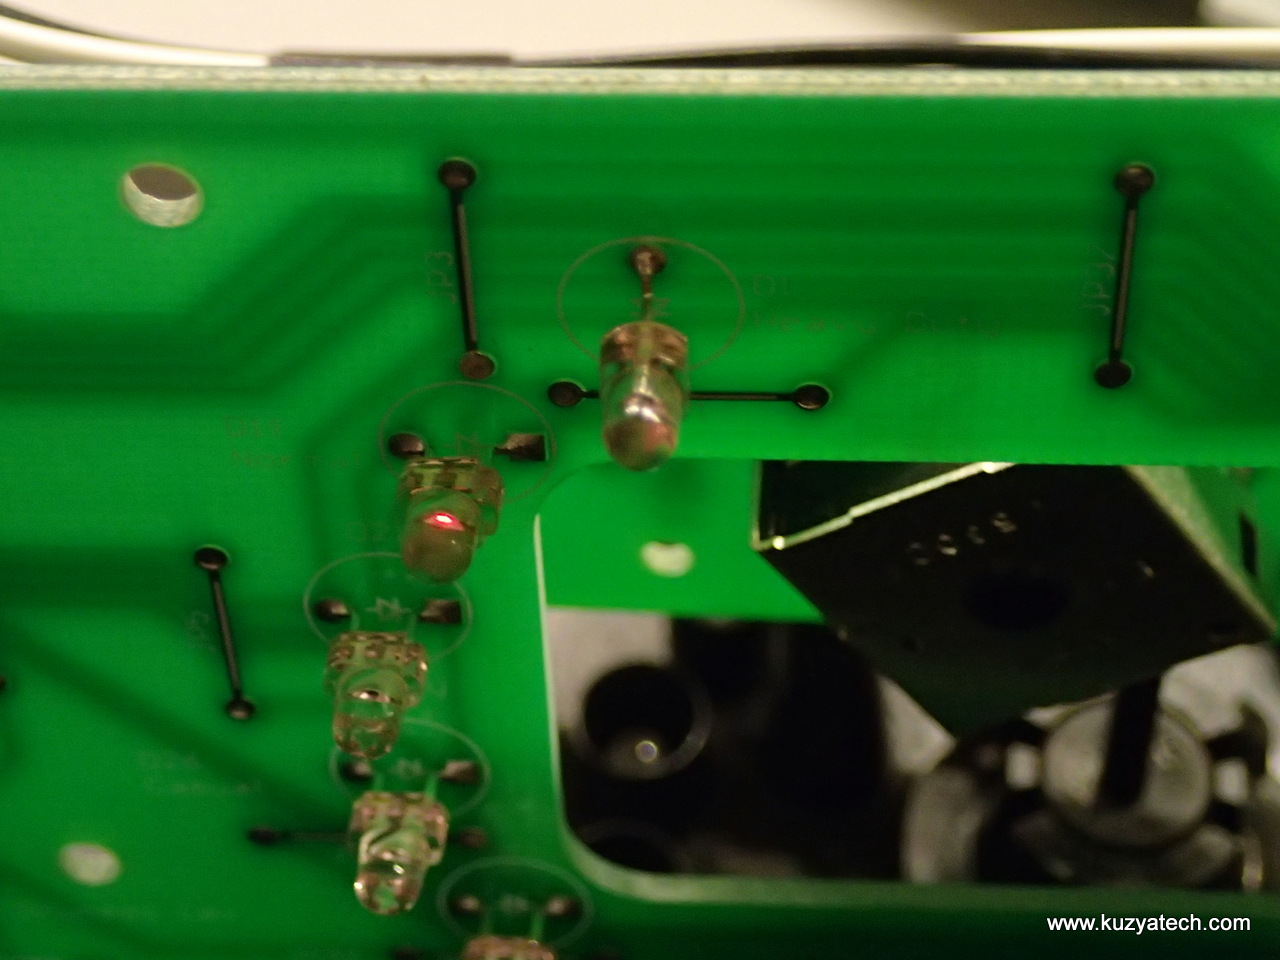
Dimly lit LED
The system was still refusing to see any key presses, so I started poking around with a scope. The whole thing runs off a single Freescale micro co-branded with Whirpool and in a giant DIP package. 5V supply and reset looked fine and there was definitely activity on the IO- I could see the micro scanning keypad lines.
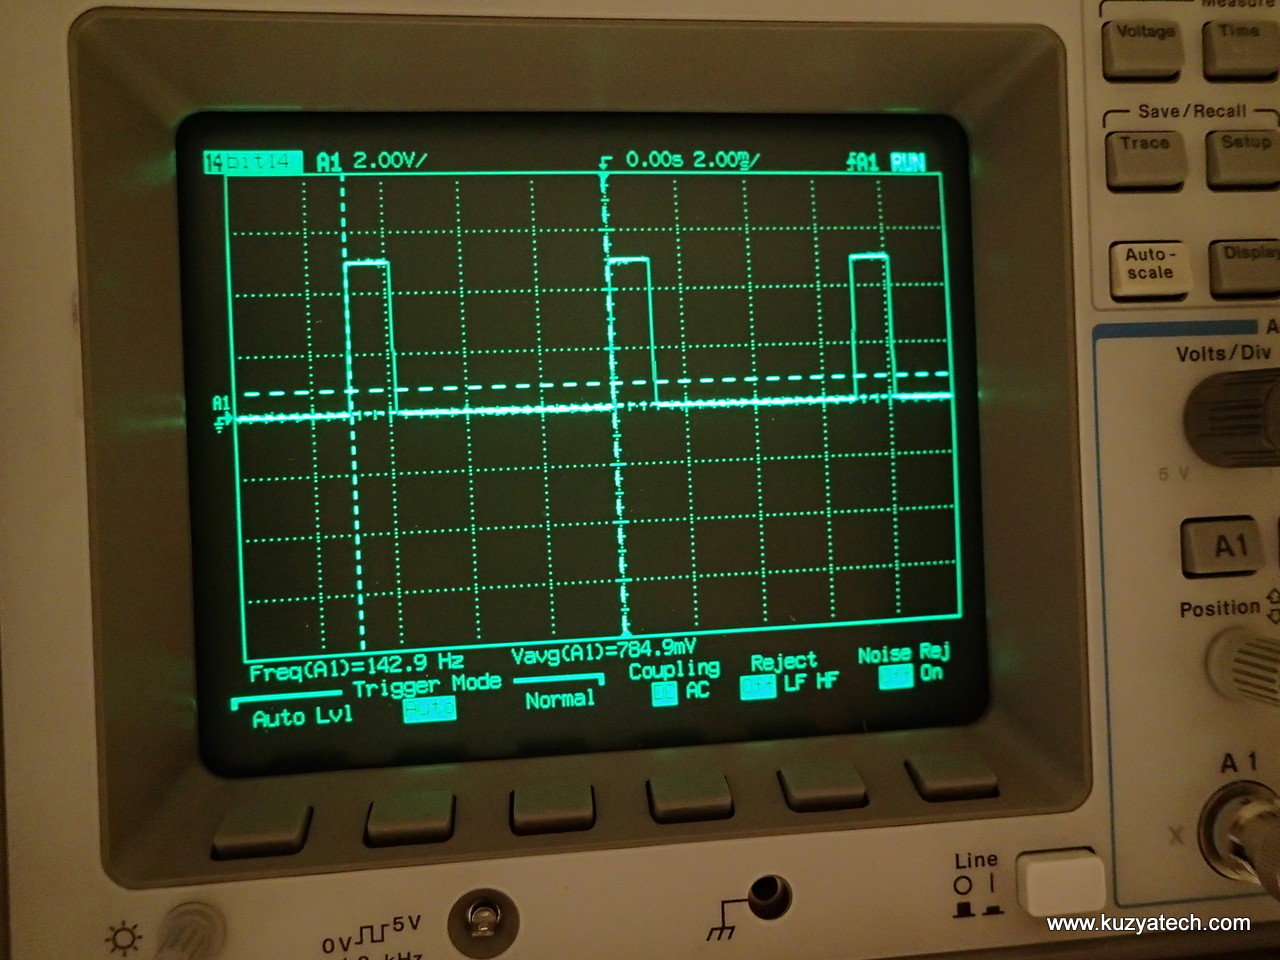
Scan signals
Looking at the number of LEDs and buttons it soon became clear that some major multiplexing was used. There was just not enough signals coming over the 14 and 6 pin cables between the boards to drive everything directly. They did though have three dedicated inputs that were going to special function buttons- things like Power On, Start etc. And two of these had a differing waveform than the third. (which happened to be a Power On!). Ok, getting somewhere.
So I kept poking and prodding and could not see any obviously faulty components.I replaced cable between the boards with separate wires and tried removing them one at a time to see if the problem persists. I even went ahead and resoldered all connectors between the two boards but nothing changed. As I sat there staring at things and trying to sketch how the whole mess of a multiplexing was implemented, I accidentally bumped one of the LEDs ( I think it was D15, Wrinkle Guard) and noticed the dimly lit other ones flickered.

The culprit
I prodded it again and the lights went off, but the system started. And of course the scan signal on the PowerOn button now matched the other two. Interesting! So I powered off the boards and resoldered all LEDs on the whole front interface assembly.

Main UI board
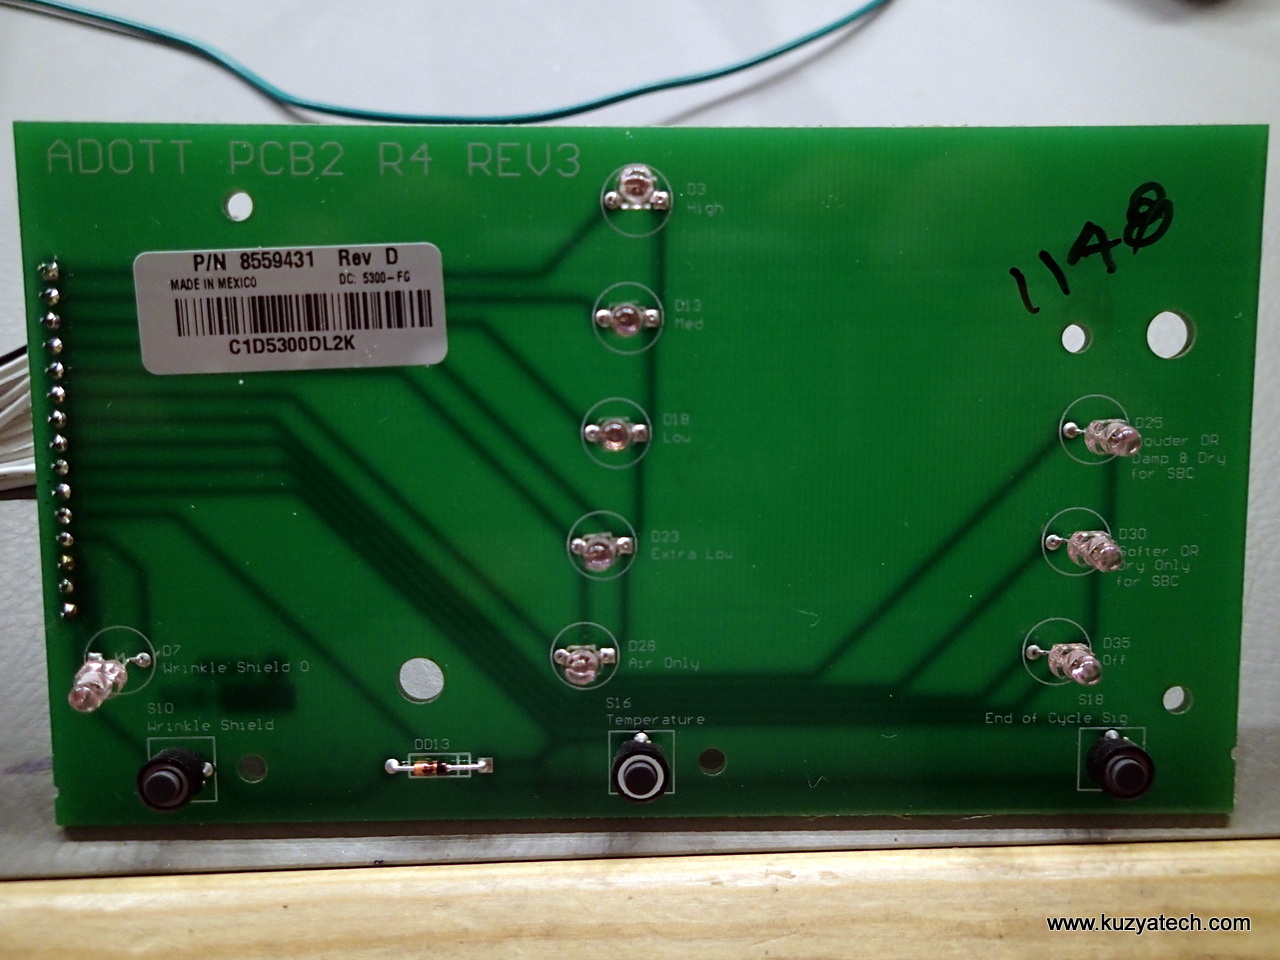
Smaller UI board
Power cycled and things were up and running. I ran built in diagnostics and all LEDS lit up normally:
Running diag
Conclusion:
It’s now been a few months since the repair and the dryer still starts every time. I’ve been too lazy to trace out what exactly the designers multiplexed together but it appears they used reverse biased LEDs as diodes in the scanning matrix. As a results LEDs that are off still affect things and all it takes is one bad solder joint in one distant corner of the board to make a seemingly unrelated PowerOn button stop working.
Disclaimer:
If you try this on your own, make sure you know what you are doing, always disconnect power and proceed on your own risk. High voltages are present in the dryer!
Great write up. I had the same symptoms and re-soldered all the front user interface LEDs as you suggested. Everything is now back to normal. Thanks.
Glad it helped you!
Well the things you find when you are looking for something else. I just happen to have the same units and have had to replace the main control board, (it hurt the wallet) as the build up of dust in the dryer case was too much for the electronics. It is very advisable that if you have one of these dryers that you pull the top cover at least once a year (depending on your use) and clean out the dust. JUST MAKE SURE THAT YOU UNPLUG THE DRYER FIRST. Thanks much for the write up and pics.
Thanks for the info. We noticed on ours that one of the LED lights is not working at all. Any idea where to start to replace the LED?
Same deal- take the display board out and touch up solder points for the LED in question and anything that looks questionable
Yours is the most useful info I’ve found but still no joy. I’ve been fighting this same issue for a few weeks. Re-soldering just the LEDs and even replacing all the switches did not solve the problem. I’ve now re-soldered every connection and via on both control panel boards and it’s working again. But, just as you said, even unplugging it for a few hours or overnight can make it work again. So sometimes “fixed” is just getting briefly lucky and then it’s dead again.
It’s a very odd problem in that letting it sit without power often temporarily lets it work. But it has to be at least a few hours and sometimes overnight. Unplugging it for even 30 minutes doesn’t work.
I’ve tried freeze spray to cool both boards, and tried heating them as well, and didn’t get any consistently different results. Normally a bad solder connection, or PCB trace/via, will get worse or better with cold and/or heat.
There’s nothing on the control panel boards that makes any heat. And just leaving the dryer plugged in and not having run (hence no heat) since the day before will cause the symptom. In my case the high-temp LED glows dimly when it’s “glitched” and the control panel will be entirely unresponsive. How does leaving it unplugged fix it under those conditions?
Looking at signals at the switches with a scope there’s some extra noise on two of the three switch polling signals when it’s unresponsive and they’re not pulling down as far. But the signal is still there, still looks valid, the timing is the same, etc. It appears the microcontroller is trying to do its job but getting the wrong data back.
You’re correct about the design being heavily multiplexed. I think the engineer responsible got a bit carried away to save a few wires as the result is like a string of Christmas lights. One bad bulb can render the entire string–or in this case dryer–useless. It’s a very fragile design especially when their own control panel diagnostics cannot even be run when the entire panel is unresponsive and you can’t enable the diagnostic mode.
The front panel assembly is currently around $300 and the control board with the power supply and microcontroller, which could also be the problem, is another $300. Electrical appliance parts are non-returnable if they’ve been installed. So I’m reluctant to spend $300 – $600 when I can buy a similar working entire dryer on Craiglist for $150 or a new comparable GE dryer for $650.
I get that manufactures want a healthy profit on replacement parts. And they don’t want to provide complete schematics so their boards might actually be repaired. But, by making those choices, they’re also filling up our landfills with otherwise working appliances that just need one part but are not cost effective to repair. They’re also driving people to try a different brand next time.
Whoever designed the thing thought they were being clever saving $0.10 worth of wire and ended up with a very fragile design that causes the entire dryer to fail if nearly anything goes wrong on the complex front panel assembly. Between the poor design, lack of detailed service info, and high cost of parts, I’m done with Whirlpool.
Totally agree with you. Another possibility is to look at used boards on ebay. Slight chance of grabbing it cheap
I agree with whirlpool being cheaply made. I also believe all other brands are following suit
I have the EXACT same problem. I ordered a refurbished control board (new ones are discontinued). I’d look at the control panel and led’s, but for the life of me I can’t figure out how to remove the front panel. Any tips?
I had the exact same issue and after removing the D15 “Wrinkle Guard St” LED everything started to work. I am not sure the reason behind the fix but glad that I came across this post before trying used parts from eBay.
To get to the interface panel remove the small T8x50mm screws holding the circuit board and also remove the dial knob at the front. No need to remove the black plastic holder.
For reference, the exact model number for my Whirlpool Duet is YGEW9250PW0. The control board part# 8267332 Rev.D The relay I was going to replace is OMRON G8P-1A4P but in this case removing the LED did the trick for me.
Thank you very much for sharing this.
Thank you so much for this posting. I don’t know why this information, you saved me at least $150 and weeks of having clothes hanging all over the house to dry.
I found your post because I was trying to figure out the pinout for the big Freescale chip so I can start to do some probing, but when I read your article and saw the same exact symptoms, I zeroed in on the display board. Like you it was hard to replicate the problem, but with enough prodding and flexing I was able to duplicate the problem on my bench (kitchen table) and then it was just a matter of selectively pushing on the components to find the one that needed resoldering.
Thanks so much!!
Well Im just another sucker working on the Whilpool Duet ‘Nutty’ dryer as well. My front panel board just looses it sometimes and alot of the leds start the Christmas tree effect on me and then the dryer decides to start up or shut down. Then the little buzzer starts howling at me. I went and did a resolder of all the pc board connections with no luck to curing the devil in this thing. It seems to run OK on power up for the first minute or so then takes on a life of its own. I can NOT leave this plugged in as it may just turn on all of sudden. Have not scoped this thing at all but just going by what Others have said, dont really think I need to. Who ever designed this cpu board should be shot and stuffed in the dyer for a day. What a piece of ( untrust worthy ) Junk.
Thanks for the tip. Ours was actually the D30 LED. Same symptoms with certain LEDs lit, off and on circuit breaker. I soldered the cold solder joints on the LED and now it works like a charm. Again thanks for the tip!!
I have a Duet dryer. When it was being moved the knob broke off, we had a repair man come look at it and they said that we need a new control board. Is this the only fix?
So we also have the cursed dryer. Resoldering the LEDs to clean up cold solder worked for awhile but it was just masking the true problem. The LEDs themselves were failing likely due to the heat stress/humidity/etc. causing them to reverse bias at ordinary voltage under certain conditions. As mentioned by others, the design is such a multiplexed mess that in this ridiculous thing the failing diodes end up interfering with the control bus.
After replacing all of the LEDs on the front panel our dryer has been working now for the better part of a year without issues.
I have a similar symptom on my Duet dryer. Does anyone know the part number for the replacement diodes?
My dryer had a very similar problem. For more than a year I would trip the circuit breaker for the dryer when I was done using it as it would work properly for a couple loads of cloths. Then it got so bad that the thing would beep at me nearly constantly. The time remaining would change drastically, the heat setting would change. It was doing so many unexpected things that I was half expecting it to stand up on it tip toes and dance!! I mean why not? It was doing everything else!
After finding your article I pulled out the front panel and re-soldered every LED and a bunch of extra things while I was at it. I had one and only one leg of only one LED take up some solder in the process. I didn’t keep track of which one it was, sorry, I was in a hurry to do them all. I can only say that it was in about the middle of the group of LEDs all the way to the right.
I put the dryer back together and the thing is WORKING!! No more unwanted magic tricks.
Thank you for your work and your article.
Glad to help keep these things from going to a landfill! Ours is still going btw, 6 years later
Great write up. I have been searching for some information to help me troubleshoot an intermittent problem on my dryer that seems to track with higher humidity. But after reading your article it may be a display board component or solder issue and not lint on the board.
I am so glad to have found your article… got out the old oscope i got in college out to look at it.. couldnt find the probe anyway, the problem for us starts early summer when the humidity goes high qnd my nightmare starts. I already had the board out and had soldered the connects which heloed a little, did all the other tricks too without effect. Was waiting on parts to replace the zeners to see if that had any input. The idea was the button was not reaching the cpu to start it. Checked for cracks and even resoldered the cpu. No effect. Noticed the lights flicker once otherwise it either worked or didnt. Not surprused about the.multiplexing but never dreamed a bad solder on the leds would cause that kind of problem (seen weird electrocis before and accidental remedies) … many many thanks to you for the fix… my wife would have been heartbroken to loose her milliin dollar laundry.
I have the same issue with the duet. It passed and it works on diagnosis mode but will not working at all if not on diagnosis mode… I never did solder on Electronic. Where can I learn it to do it? Thanks