
Today we have a new subject to tear down- my own Sonicare toothbrush. At the end of a brushing cycle it made a short “Beep” noise and went silent. No reaction to button press or to putting it on a charger. No lights, sounds or anything. Oh well, might as well take it apart.
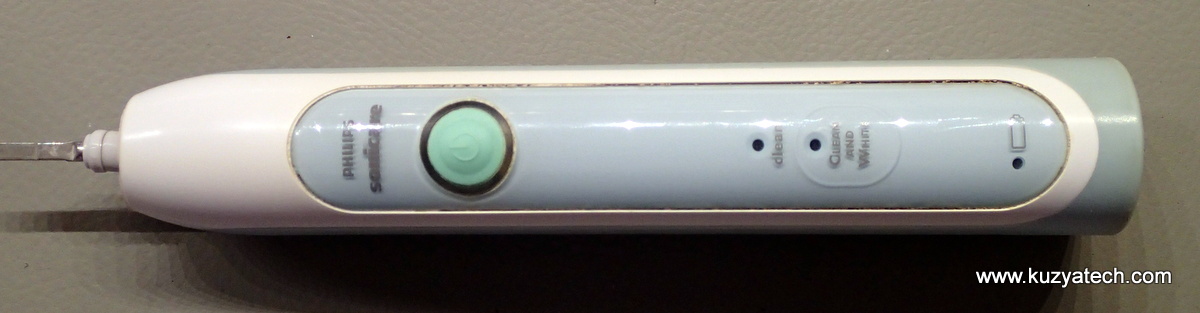
Philips Sonicare
At first glance the thing feels permanently sealed and non-repairable. Even the user manual basically states that. They do however mention that you could open it to remove the battery for recycling prior to disposal. You do that by inserting a large flat screwdriver into the slot on the bottom and turning it to unlock. You then press on the metal shaft to get the “guts” out of the case:
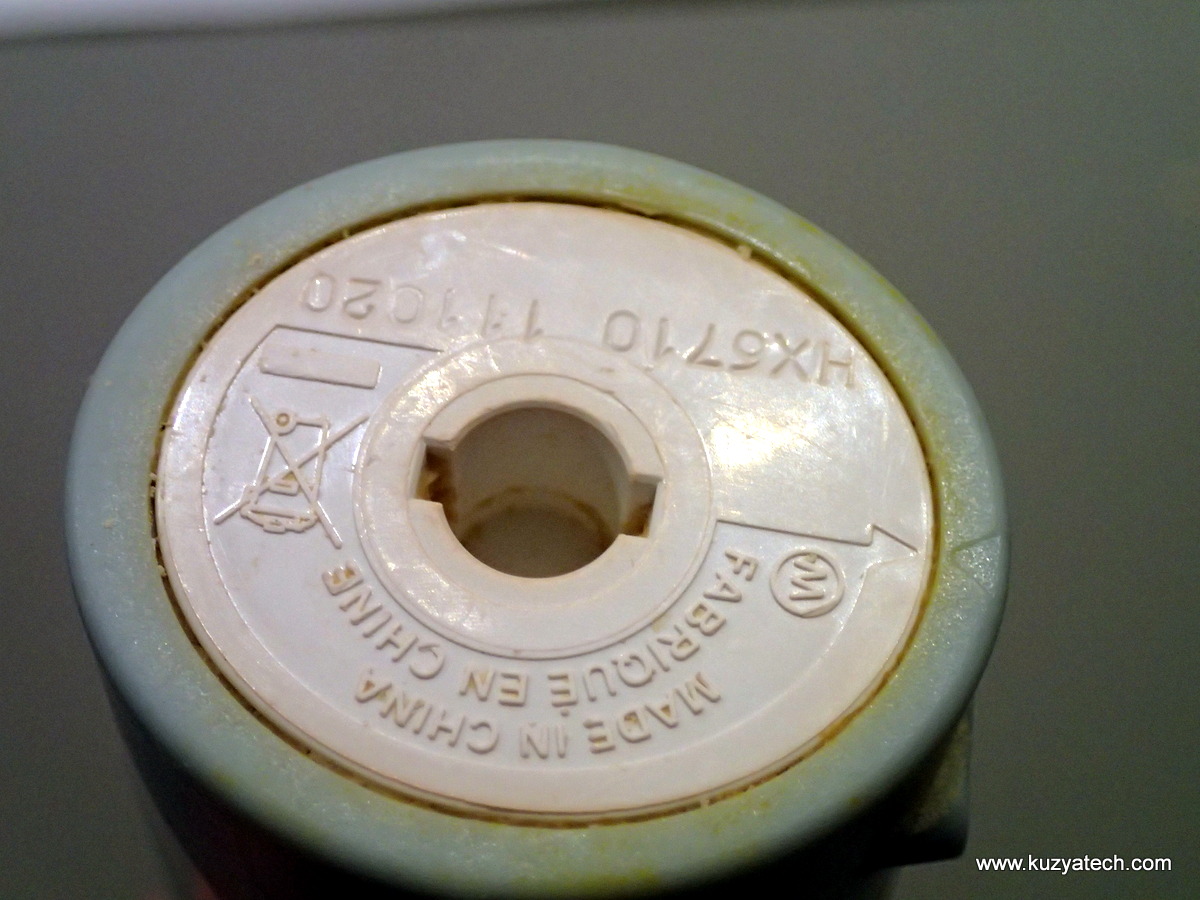
Insert screwdriver into the slot and turn
Apologizing in advance for a lack of one single picture of the insides, let’s proceed to detail shots
I can get debug output from my toothbrush?

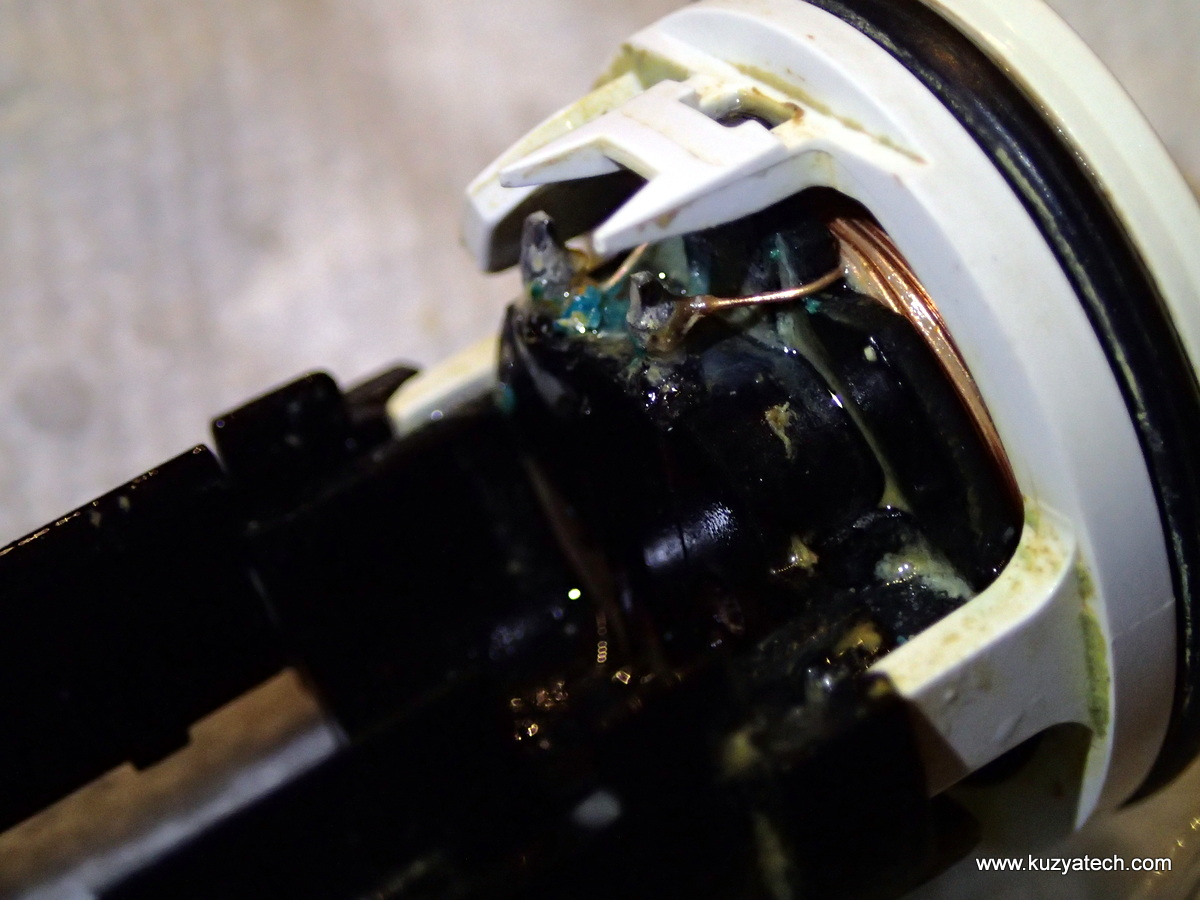
The whole bottom of the assembly was full of crud and water, no wonder things stopped working.
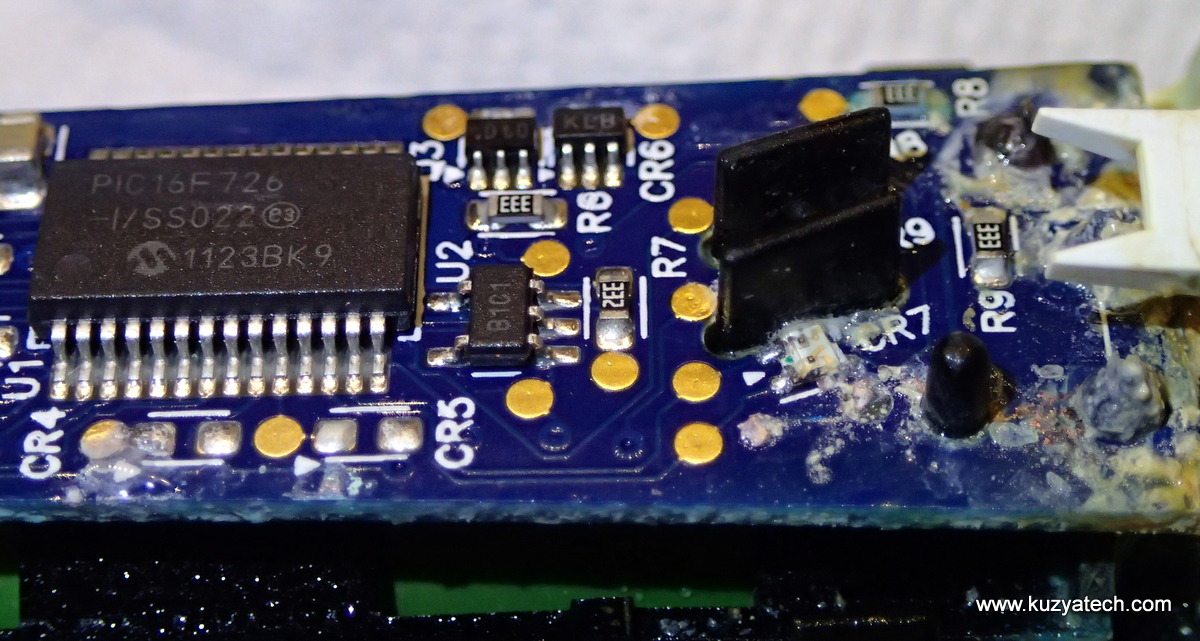
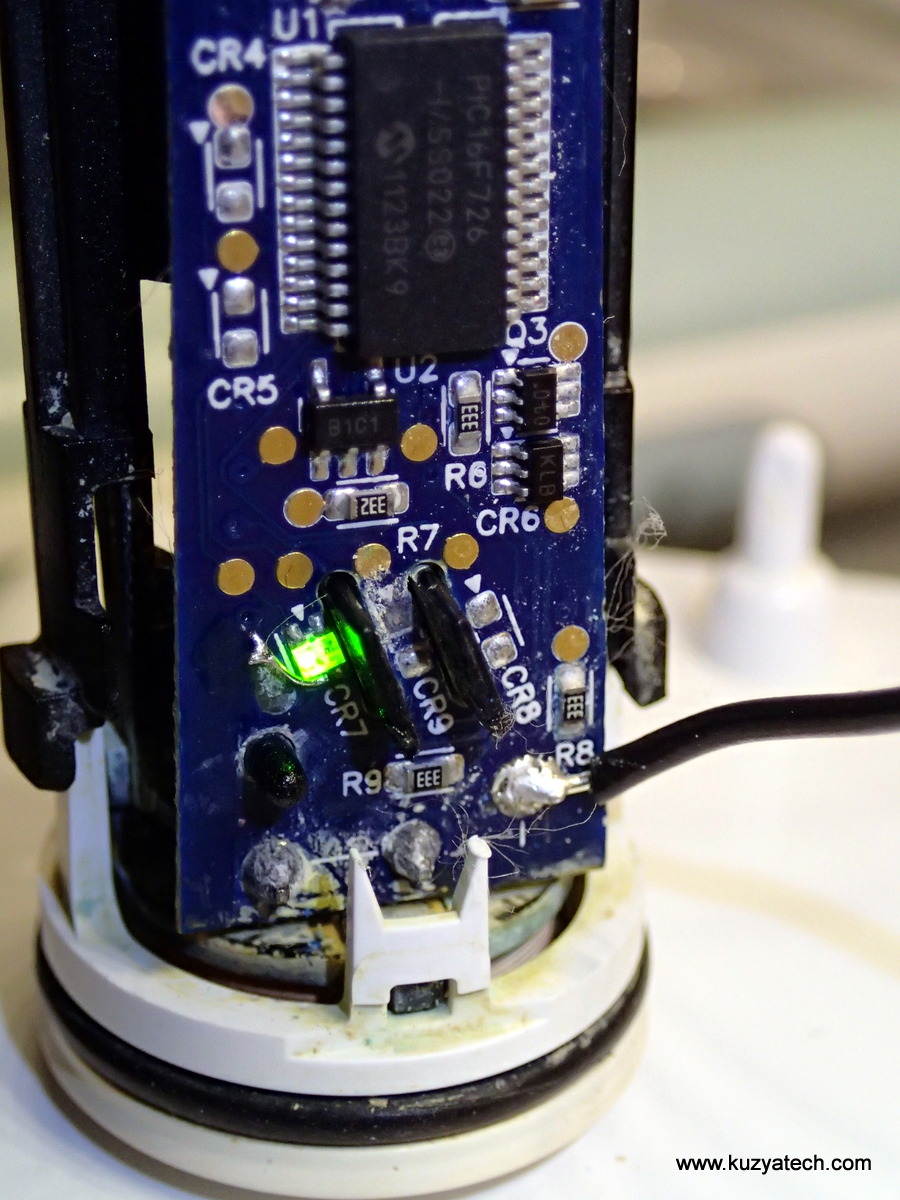
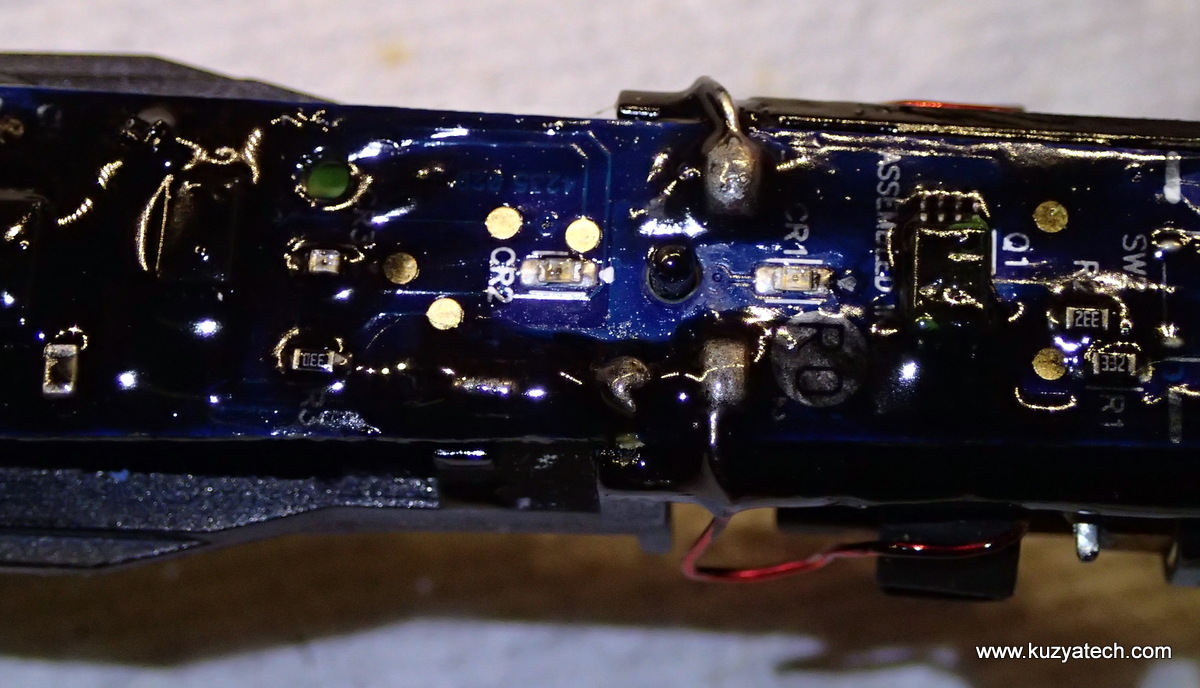
Lots of gunk and corrosion. MIcrochip PIC16F726 runs this show
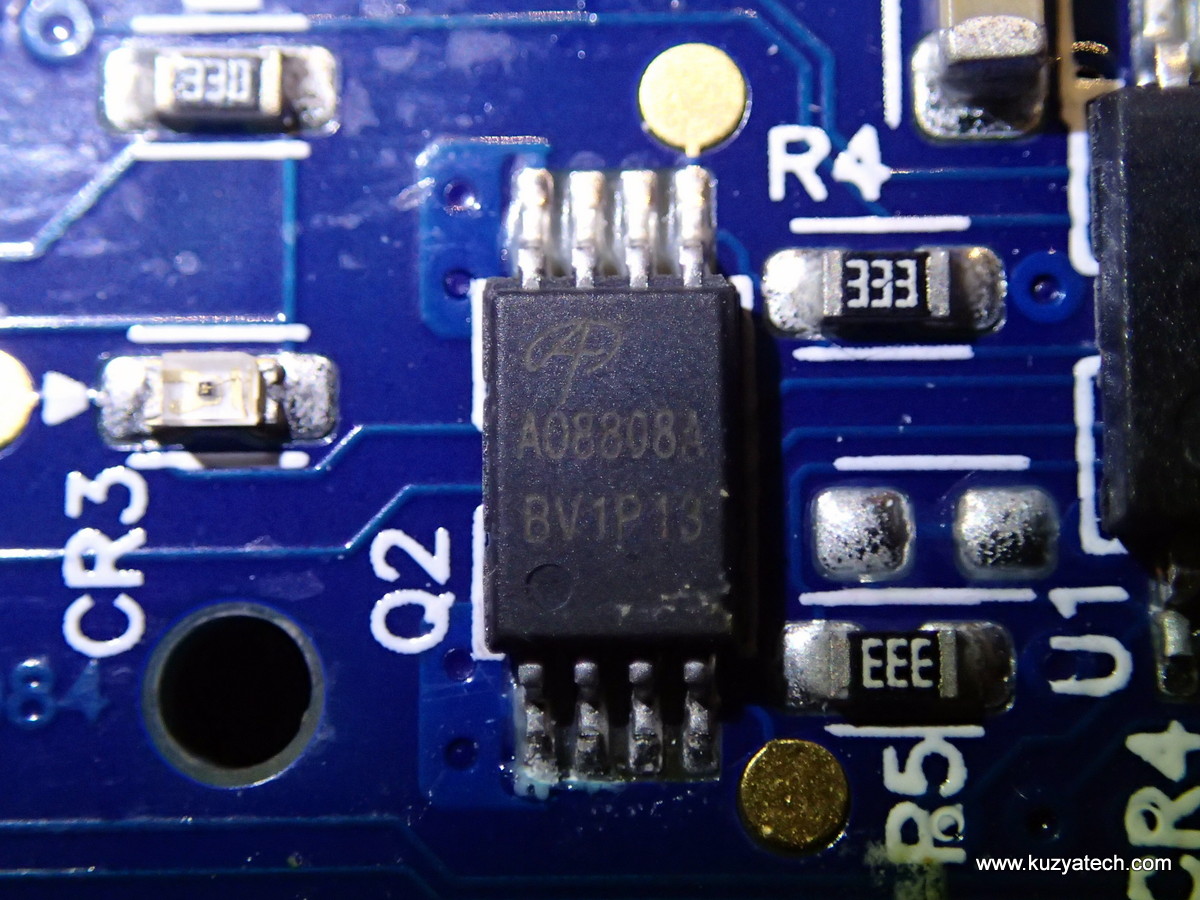
Alpha and Omega AO8808A Dual N-MOS

TSM6981D 20V Dual P-MOS by Taiwan Semi
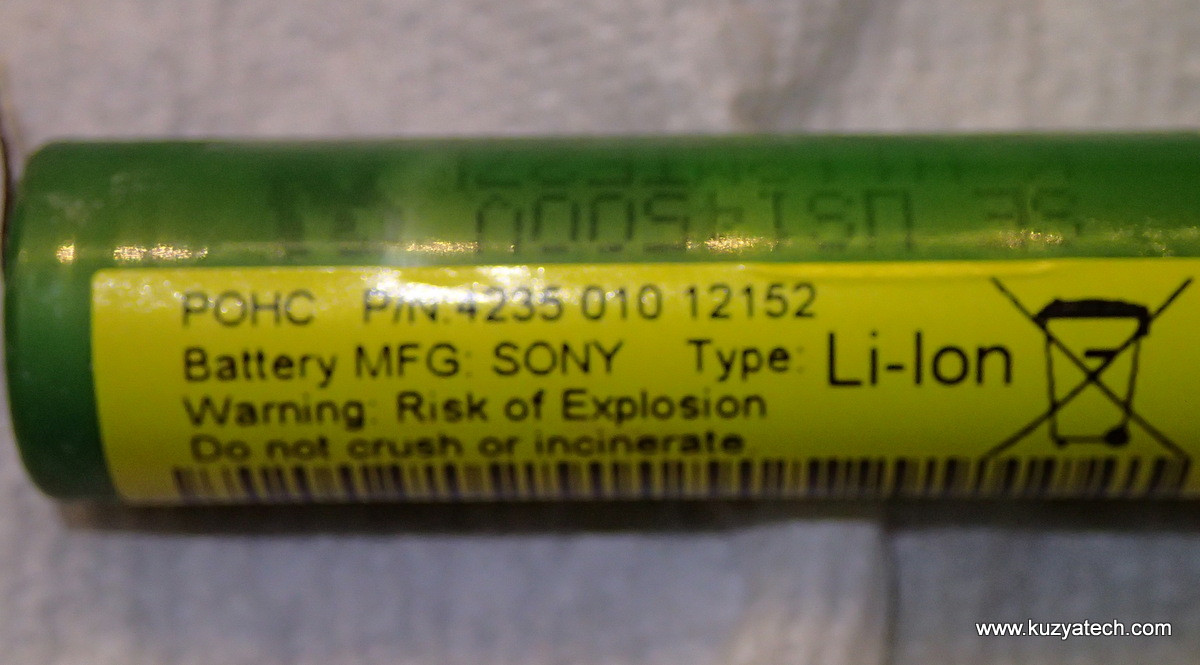
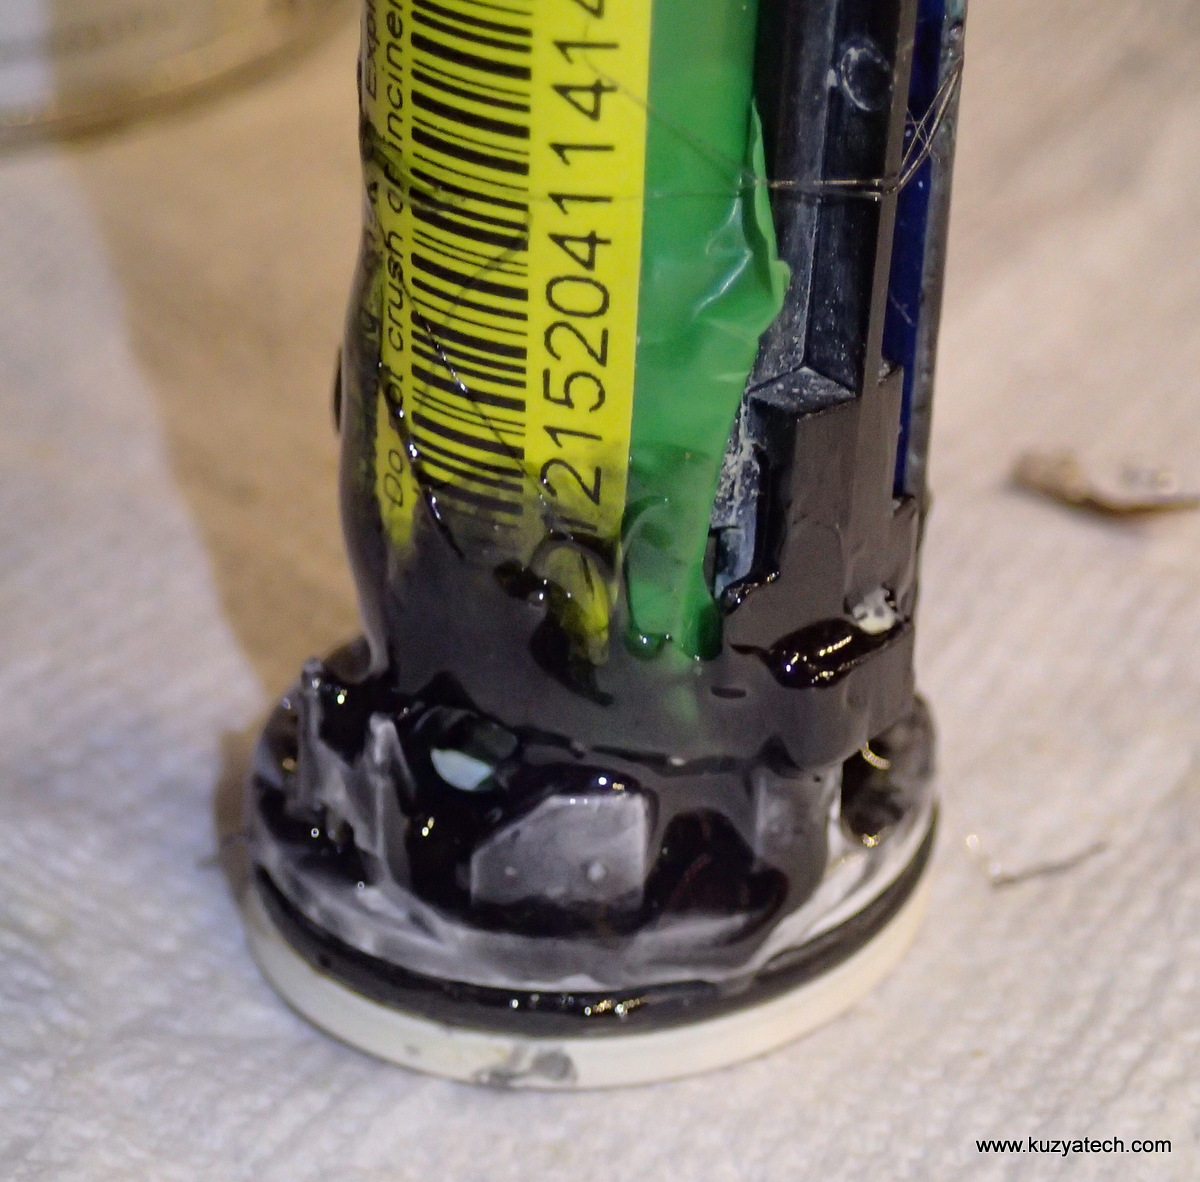
Sony SE US14500V
The first step is to de-energize things seeing how much water is around. So I desoldered the two pins of the battery and pulled it out. This brush uses a Lithium Ion Manganese cell from Sony. On removal, the voltage on it was rather low- 2.5V or so, but I decided to let it rest to see if it recovers from whatever short is saw. I briefly looked around for replacement cells, and did find a vendor on ebay selling them, but was not able to confirm the chemistry of his cells. Lithium Ion comes in many flavors, and this particular application warrants the safer Manganese ones.
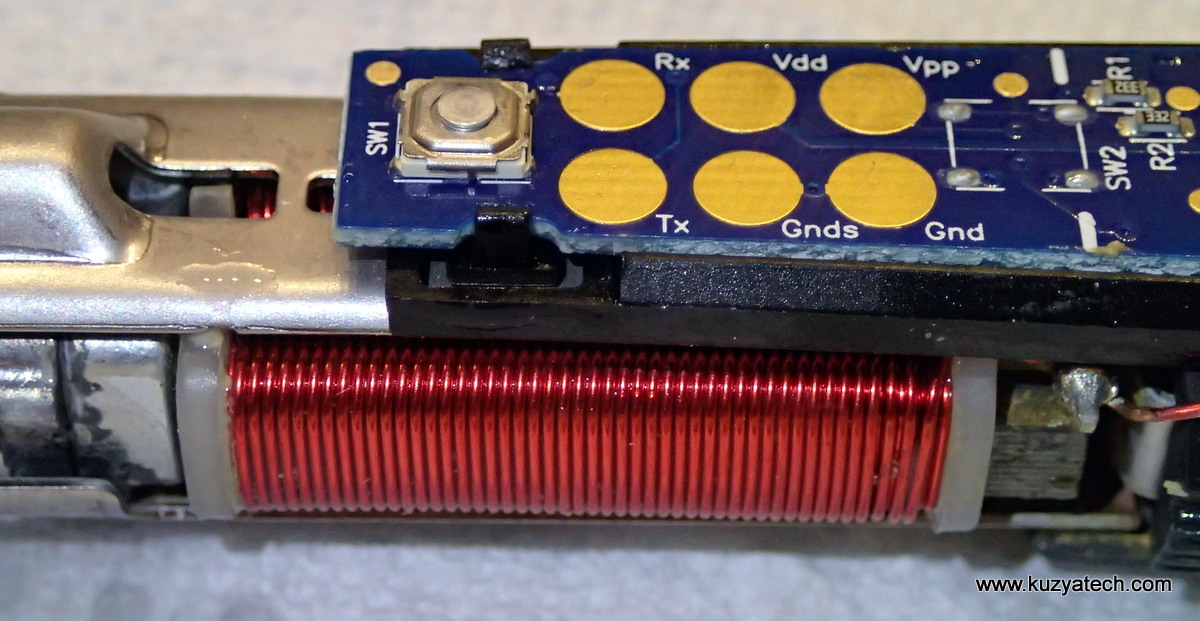
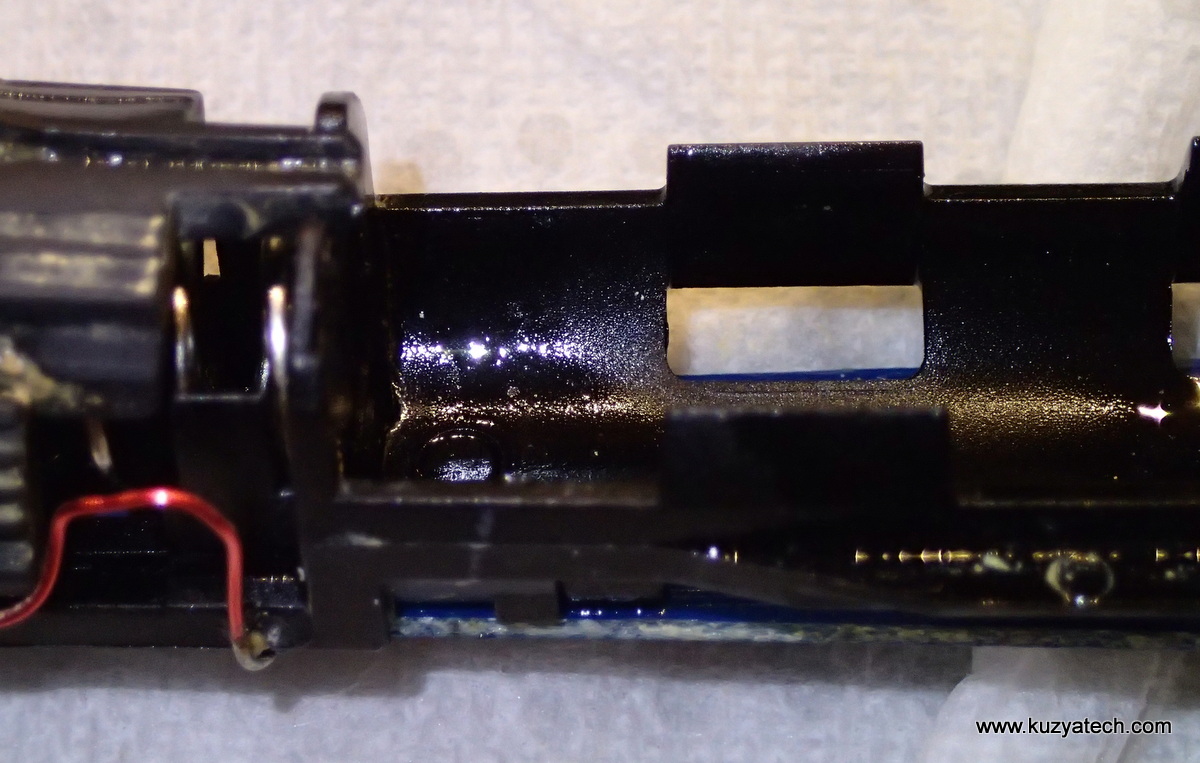
With battery removed, more wetness is revealed, especially around the charging coil
After scrubbing everything as much as possible with alcohol and letting it dry for a few days, I reconnected the battery externally, added current and voltage monitoring and tried to put it on a charger: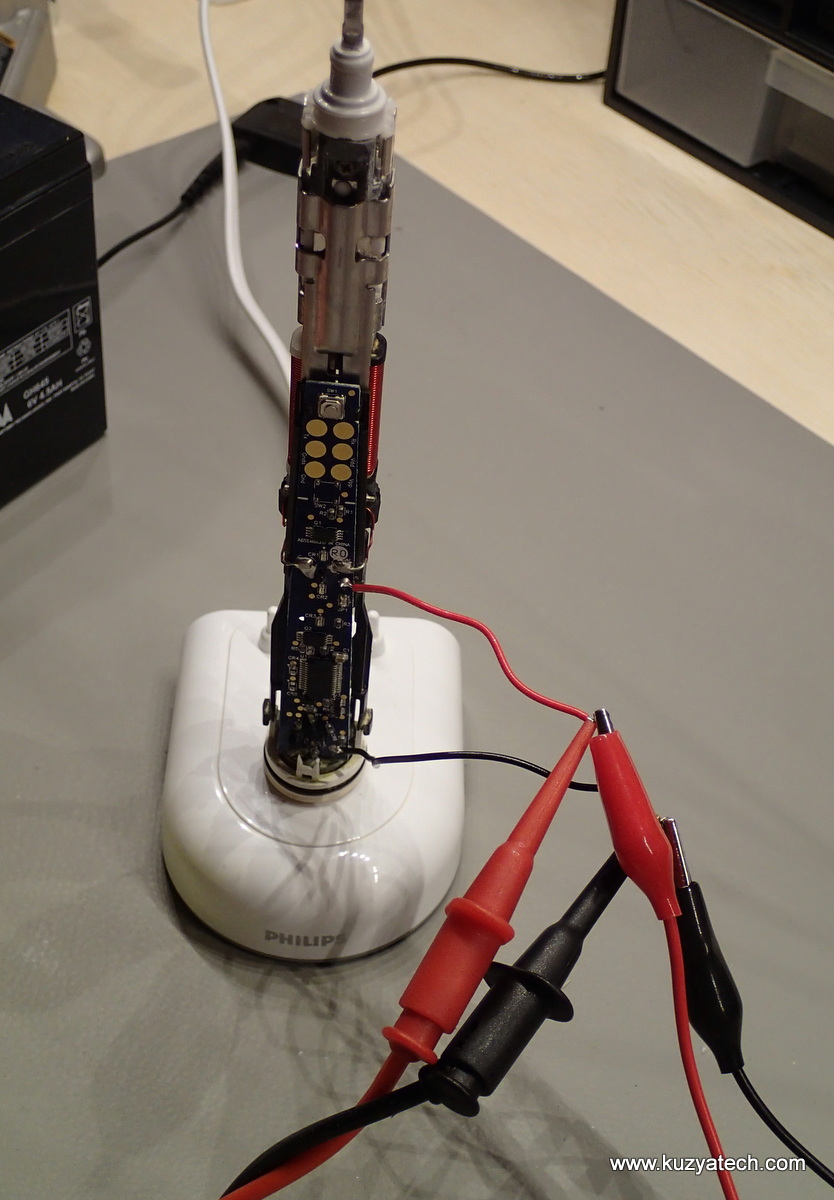
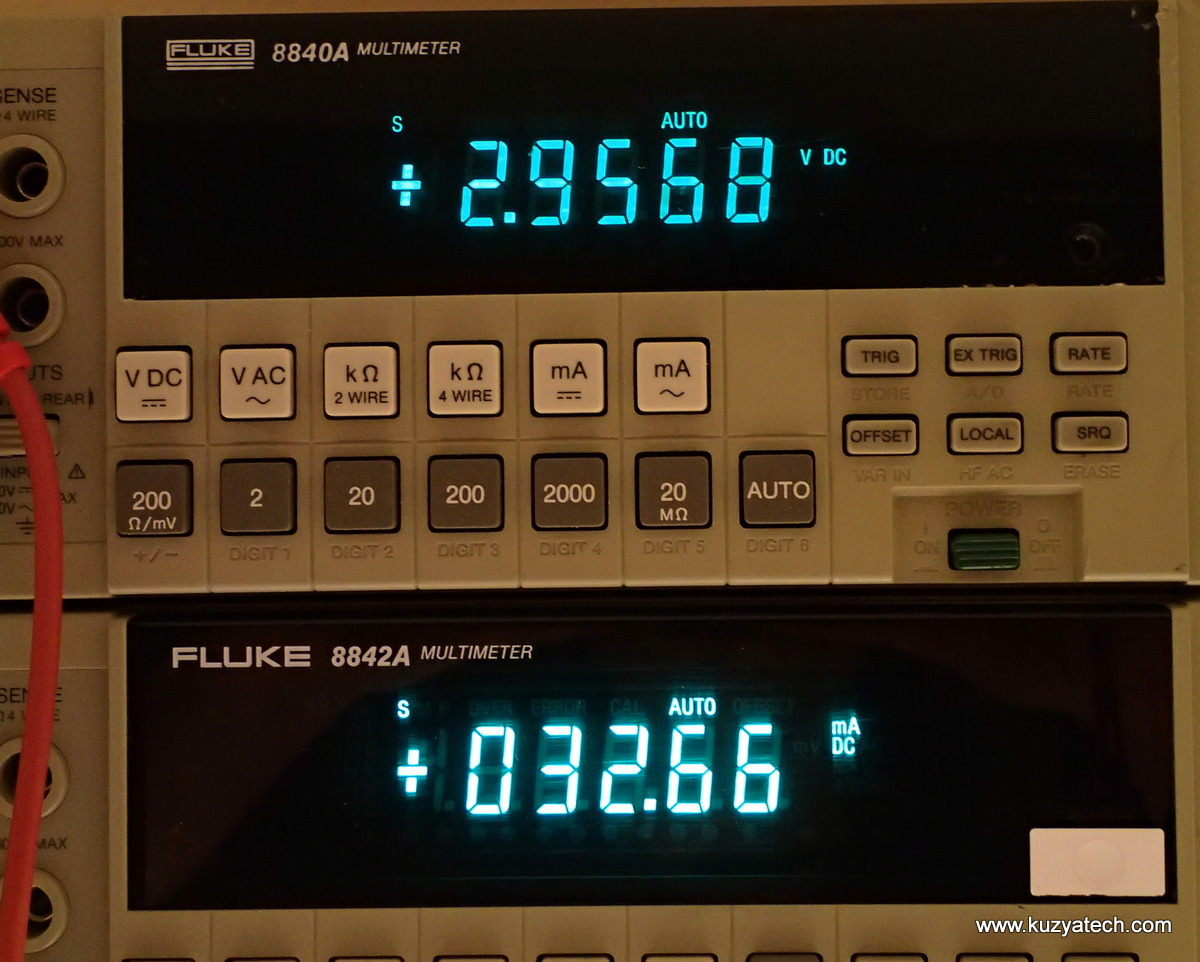
Battery voltage started slowly climbing up and the current looked reasonable- 32mA is about right for a 800-ish mAh cell that charges in 24 hours. At least this indicates the battery is somewhat behaving and the charging coil is still alive. Looking at the coil pins directly, I see 2V P-P square wave at about 80 KHz. So far so good.
Charging in progress
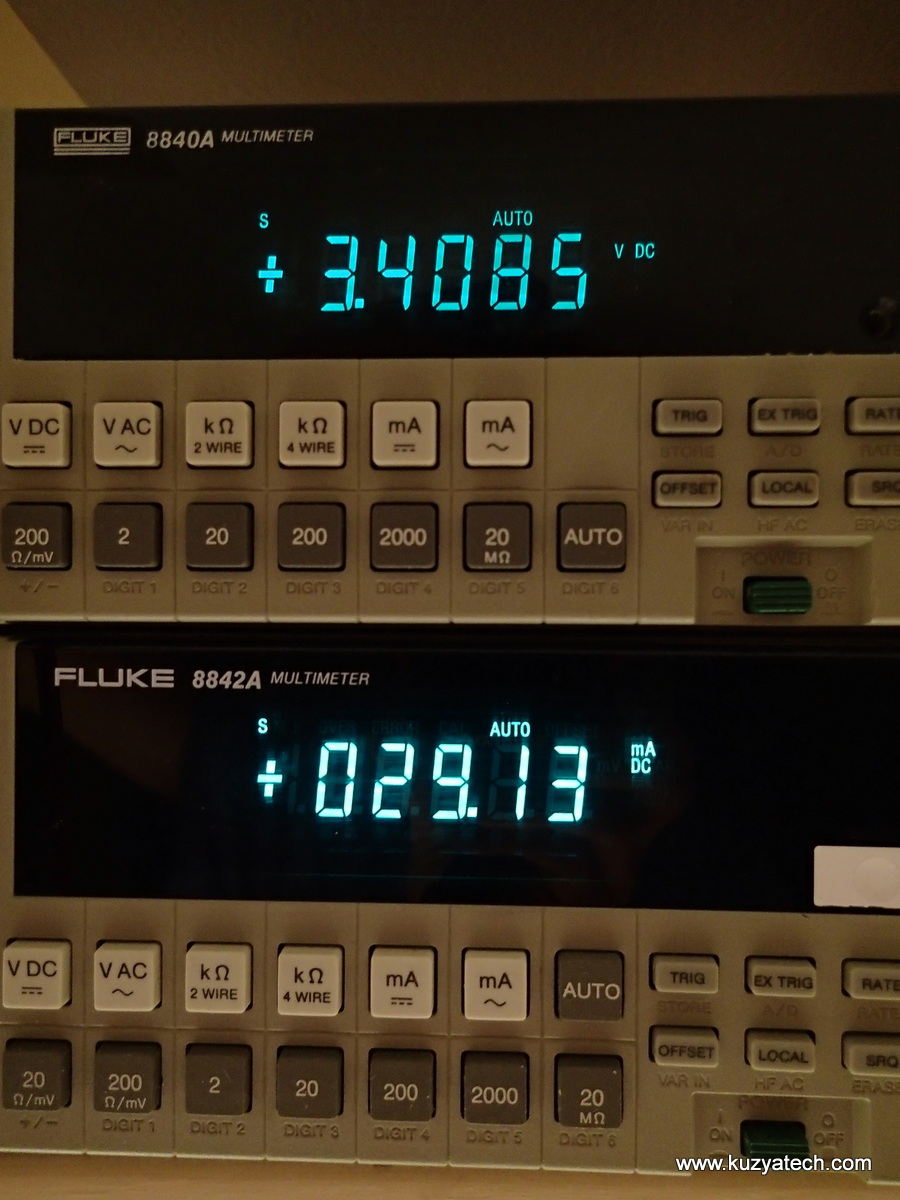
Getting there
After letting it charge overnight, I disconnected the ammeter, and tried running the brush. It happily started. So it appeared most things were functional and we just needed to see why charge light did not come on while on the charging base.
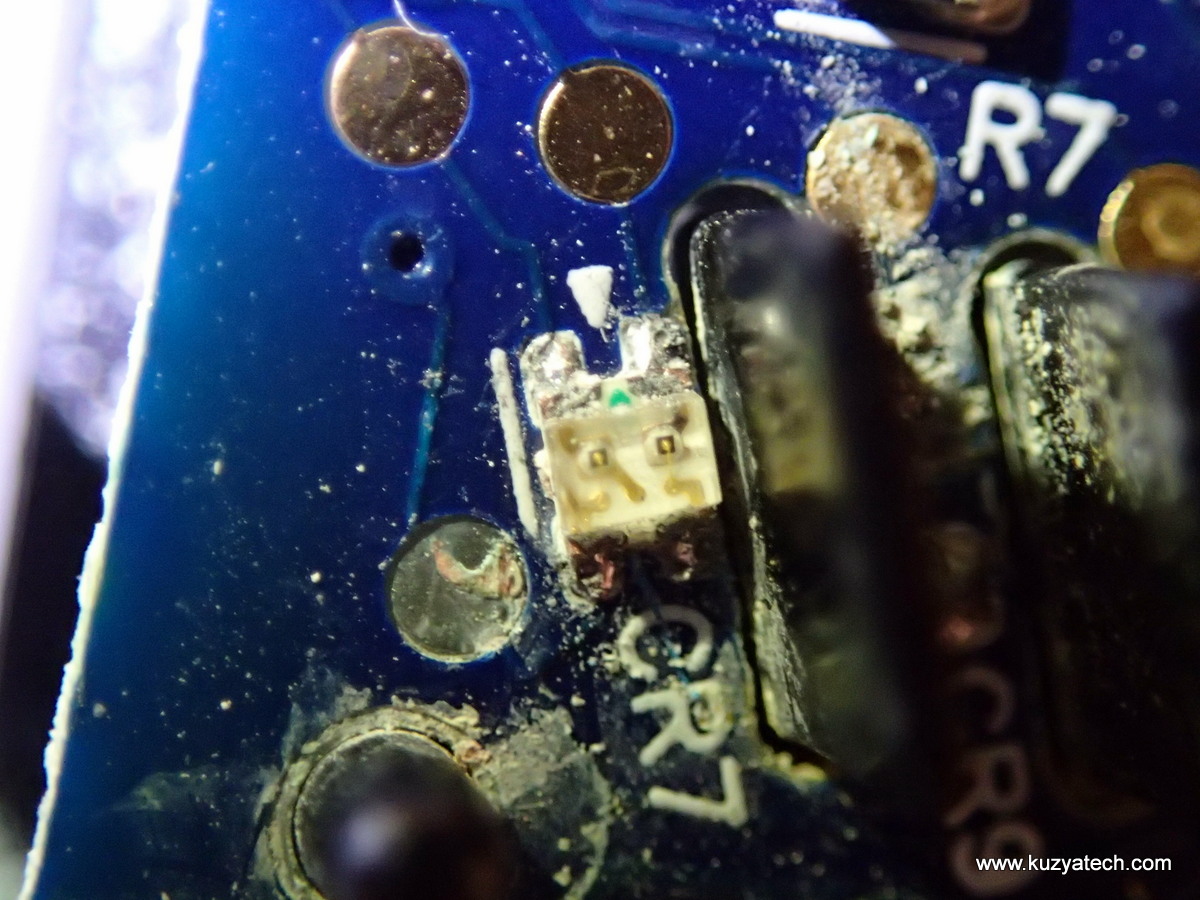
I wonder if the empty spot where a test point left of CR7 used to be has something to do with this?
Poking around CR7 (a dual LED) with a scope I could see the top left pin seeing a square pulsetrain of about the right frequency for blinking. The right top pin had solid 3V. The bottom pins were floating. They seems shorted together on the board and going somewhere on the microcontroller through a trace that used to be there. It appears corrosion completely removed it along with the test point. As a quick test I connected the bottom side of the LEDs to battery + and the blinky light returned. From now it was pretty simple- repair the trace and we are back in business.

Repaired trace
The repair consisted of scraping solder mask until I could find some resemblance of a solid trace and then soldering a piece of wire from that to the LEDs.
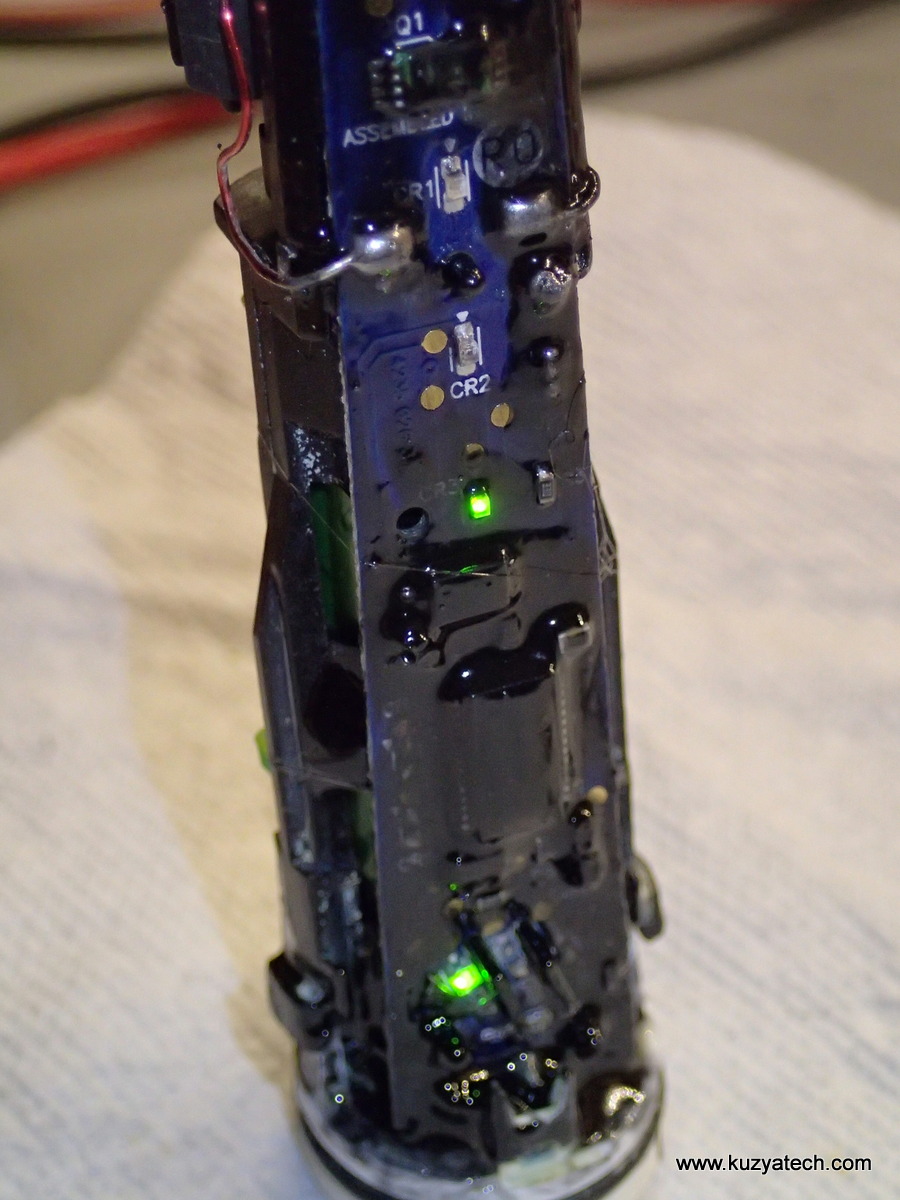
It’s alive
With functionality restored, I turned my thinking at how to make sure this brush lasts for a while longer. First I cleaned and lubricated with a silicone grease the rubber o-ring on the bottom and the white gasket on the top of the assembly:
Clean/lubricate here?
I then reinstalled the original battery, made sure thinsg still worked and decided some conformal coating would be good at this stage. Not having any handy, I turned to the next best thing- a can of liquid tape:
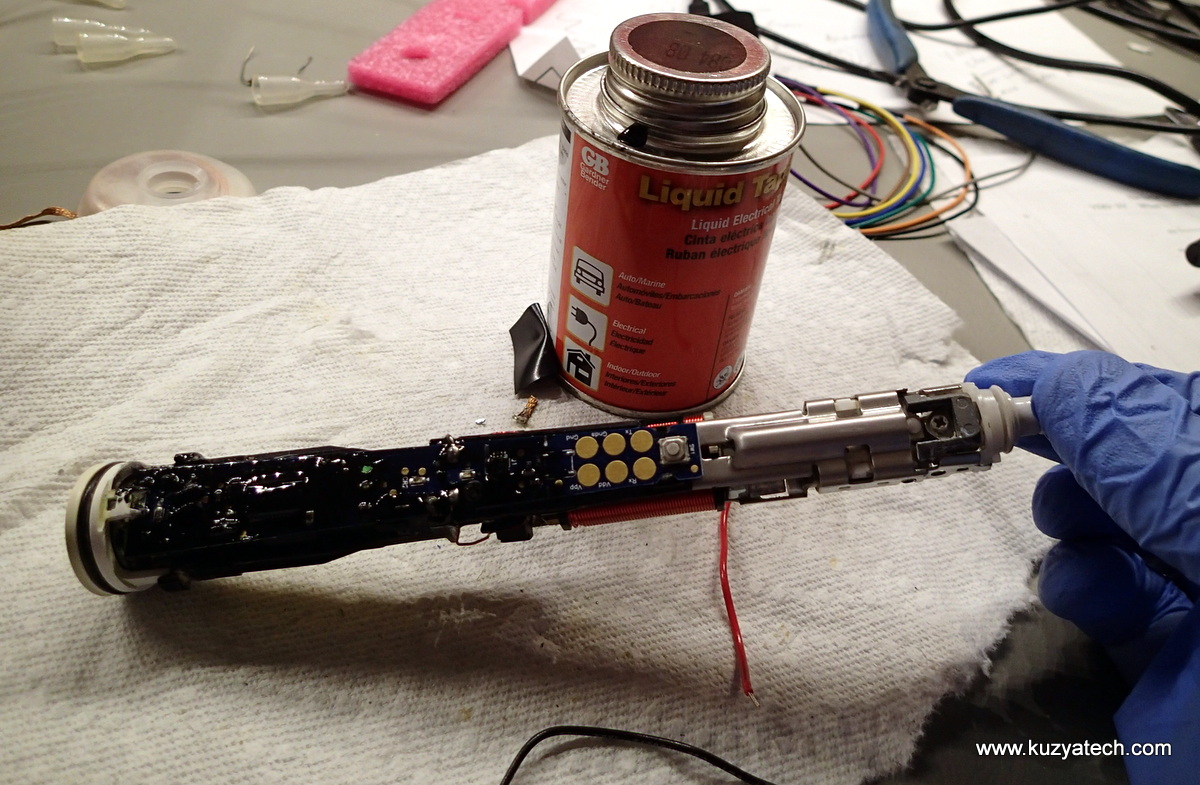
Some Liquid Tape goodness
I tried to cover every surface, avoiding the LEDs and the button. I then poured some more on the charging coil wires as that’s where most of the moisture ended up. I don’t know if at this stage this will help, or possibly make things worse by locking in whatever corrosion has already started. So if you are following along at home- the usual disclaimer applies. Proceed on your own risk.
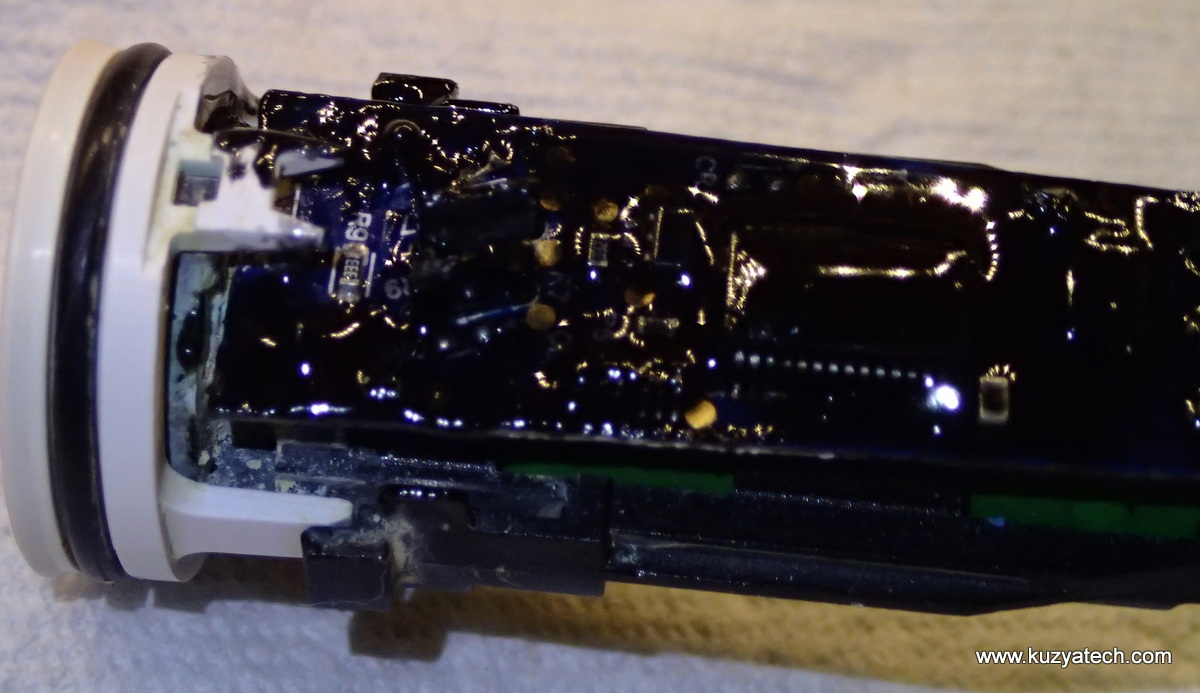
Keeping the LEDs clear of coating
Coating the charge coil
Completed assembly drying and charging
After a few days of drying, I’ve assembled the toothbrush by inserting it back into the housing and turning the bottom a bit until the latches clicked. The slot in the bottom cap is in very soft plastic, so some of it got torn up during removal. Oh well.
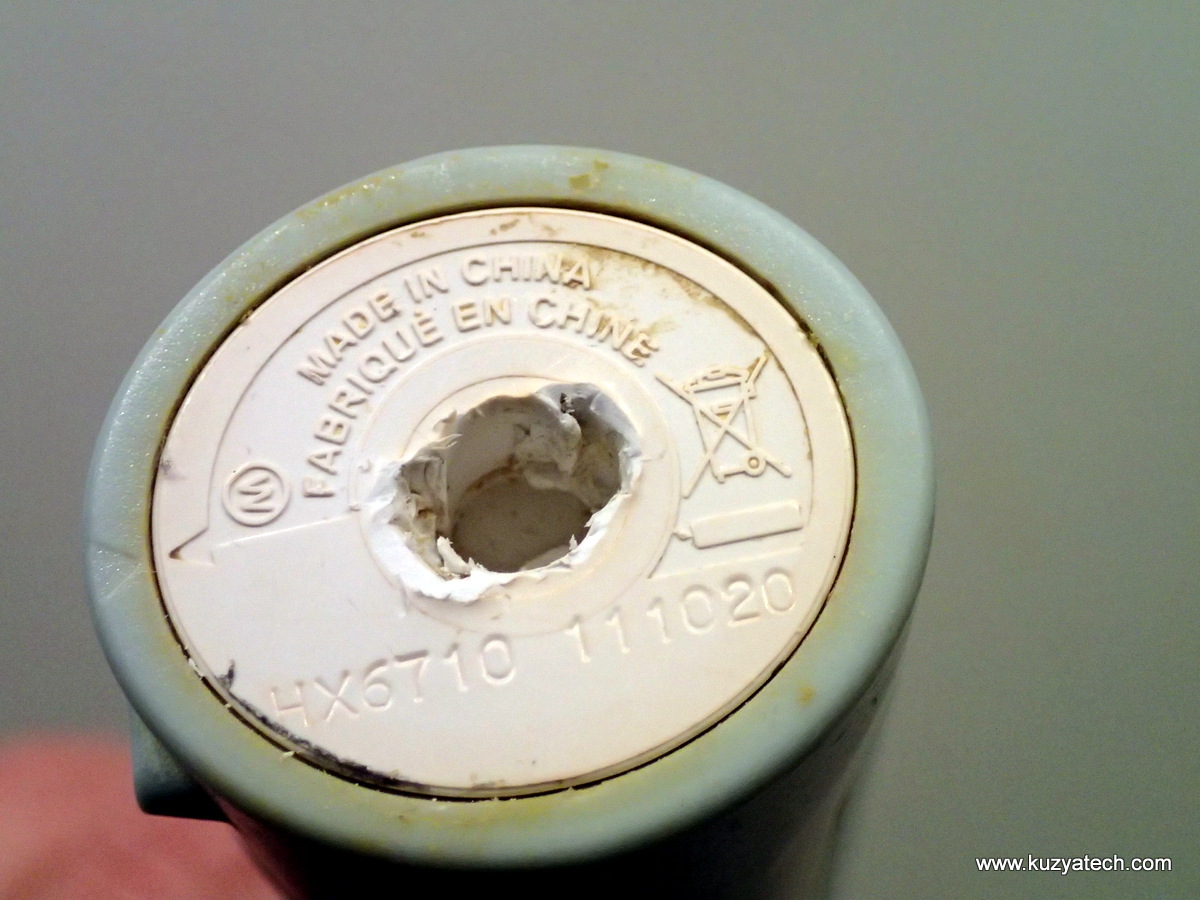
Very soft plastic
Conclusion
So far so good- the brush is back up and running again. I don’t know how long it will last until something else gets corroded, but at this stage I took whatever precautions I could to prolong its life. Philips,on the other hand could have spent a very insignificant amount of money and coated the electronics in production, greatly increasing reliability. For something almost guaranteed to get water inside, it’s something that really should have been done. Of course that would mean handles lasting way past the warranty and fewer units sold, so why bother..
Electronically, the design is relatively simple- we have AC waveform coming in through the charge coil, rectified and converted to DC to charge the battery at a low rate and to feed the microcontroller. The Micro (PIC16) runs all the indicators and controls the vibration motor.
Disclaimer
If you attempt this on your own, you’ll be working with unprotected Lithium Ion cell, which has enough energy to cause a mayhem. So be warned and proceed on your own risk
Just want to remark, this is awesome!
Very details and easy to understand tear down. Thanks. From Singapore.
That’s hilarious. Awesome work on the brush. I have the same one. Still works though. Was just researching a place to get cheaper tips, and found your post.
This is fantastic!
Quick question:
Can you tell me if the voltage output of the toothbrush is the same, whether it’s being charged with a 110V base or 220V base? I’m traveling to Hong Kong from the US and have both types of chargers. However, the toothbrush has been only charged in the 110V charger and I’m wondering if I’m going to fry the toothbrush if I charge it with the 220V, in Hong Kong.
Sonicare Technical Support, has been less than worthless in answering this question for me.
Any help would be appreciated.
I’d imagine it should be- they basically create AC field and then the coil in the brush converts it to DC. Without having the 220V charger have no way of confirming that though
My Sonicare Essence base in fine white lettering on a white background near where the cord attaches, states 110/220 AC. I just returned from Chile and Argentina where voltage is 220. The charging worked fine in both countries.
You are very good at the electronics of the Sonicare but are not very good at getting it open. There are a number of different versions of Sonicare brushes, but the Flex Care can’t be properly opened with a screw driver without causing the damage you experienced. Wrap several layers of 1″ tape around the base and use a vyse grip wrench to distort the soft case across the high points of the oval while inverting the handle and pushing down on the shaft. The guts will come out easily. If you look inside the case after you’ve removed it you’ll see two rectangular depressions in the case that two tabs on the brush guts fit into to lock it.
Thanks for the idea!
pinch at the high points? but from the photos shown the rectangular tabs are located on these high points so pressing on these points would only tighten them up. maybe press at the narrow points?
No, gently squeezing the wider sides with vicegrips while having the thing upside down and pressing on a hard surface made the guts come out with zero damage to the base. I wrapped a rag around the base first, to not leave teeth marks from the vicegrips.
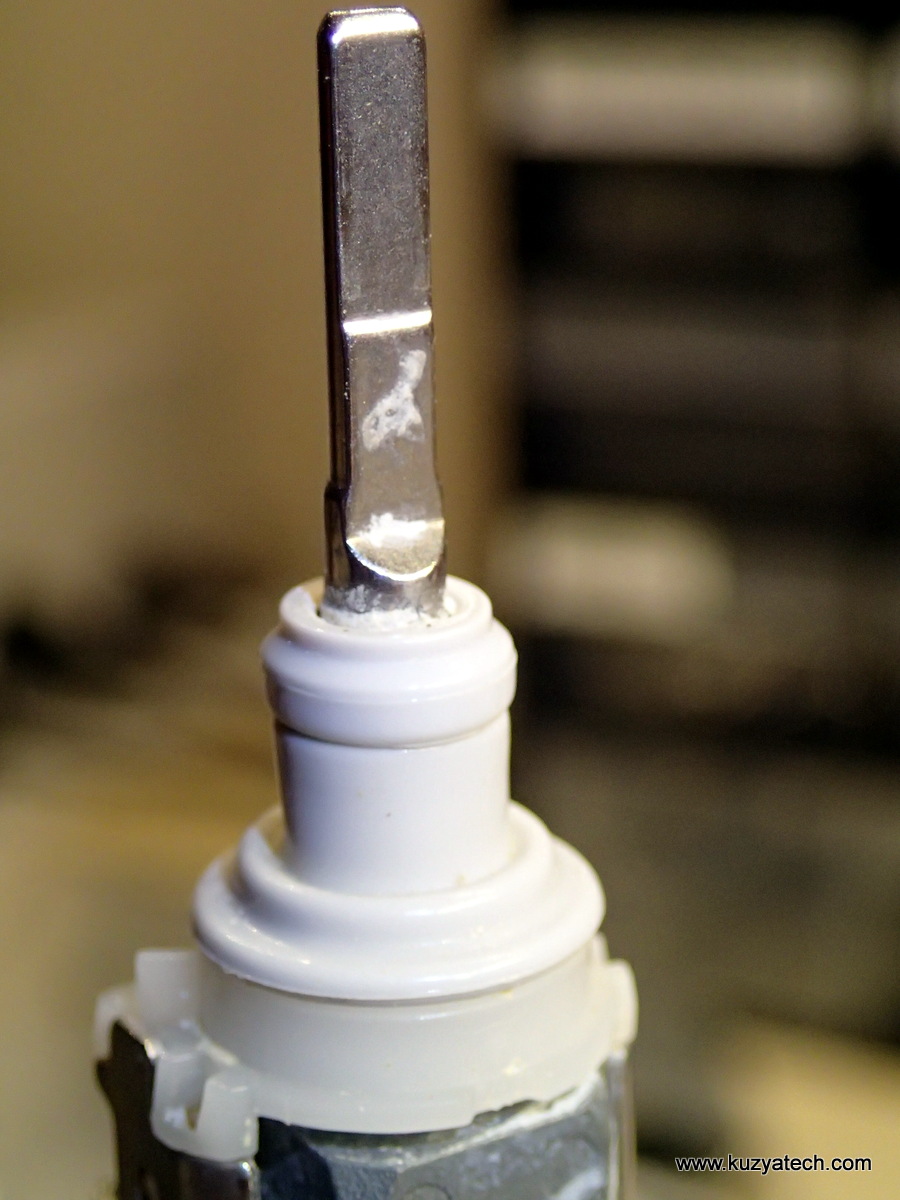
My problem was different in that the metal piece which goes inside the toothbrush came loose from the vibrating part. On inspection, there is no retaining screw or anything, so I have to assume it’s press-fit. With no other choice, I used heavy duty contact cement, and it seems to be holding. We’ll see how long it lasts. The previous Sonicare I had lasted 11 years. This one broke after 18 months.
And incidentally, I’d like to thank the author for taking the enormous amount of time it took to put this article online. Without selfless people like you, people like me would have a much harder time fixing stuff. So thanks.
Update: The glue did not hold past the first use.
Unless someone has an idea of how to secure the piece back into the main body, I guess it’s time to buy a new one. Really annoying.
I used the Essence series and never had a problem they worked for about 5 years and went belly up , I never took one apart to try to repair one, but I bought one of the newer HX series and they only worked about a year each and both pins that hold the brush got vary sloppy and failed to make the brush vibrate. I took them apart and found a screw and a small washer shaped like pyramid , I saw where it fit in picture 11 and 19 , I placed it in position , tightened the screw and it is back working again , don’t know for how long , but I do not recommend this type of toothbrush they are too flimsy. Don’t understand why they came up with these , when I called sonicare the agent I talked to said the Essence series 6700 and 6900 are much better designed and built , So I will be using them from now on , they all operate and 31000 vpm so at least they will work for a good period of time ..
Because of a accu who had to be changed, I opened both my sonicares.
They are used about 4 years.
Unlike here described, I didn`t find any corrosion.
We cleaned the rubber under the removal toothbrush every time very carefully.
If this rubber is damaged, then corrosion is possible.
I’m laughing because the bottom of mine looks just like yours after my first attempt to take it apart. My top seal was shot and moisture got into mine. It became possessed and turned on and off randomly. After a good dose of contact cleaner and new seal, it’s as good as new…..well accept for the bottom!
Hi! My seal is torn too – where did you find a replacement? Many thanks!
On ebay.com now
LOL – Same problem here – the toothbrush randomly dances across the vanity on it’s own. Where did you get a new seal, or what did you use?
Hi! I posted my question before I noticed yours. Did you find ever find a new seal, or anything that can be used as a replacement? Thanks!!
my soniccare charger is 110 volts. other than using bulky 220 v to 110 v transformers can i series a capacitor instead to the charger line to lower current and be able to plugin straight to 220 v? thanks.
The rubber at the outside tip has deteriorated. How do I replace it? Does this have anything to do with how it operates?
Have to comment on removal of the bottom disc holding the “innards” of the Sonicare Flex. I thought the slot for screwdriver would work if done properly even after reading and seeing “disasters” such as you picture. The secret is to find a blade screwdriver of the proper snug fit. This is what I did and twisted gently but firmly counter clockwise just a few degrees and the disc was easily freed with the original slot undisturbed as new. Just be sure and get the right screwdriver-it must be very snug, not at all loose..
Good suggestion- thanks! As luck might have it, two years later my replacement unit is having “water shorting stuff” issues, so I had to take it apart. And once again I destroyed the cap on the bottom. The good thing is, there is now an ebay seller carrying those for about $6
Jim, thanks for the tip, I was able to remove the bottom cap of mine without significant damage. I also used a vice-grips with pressure on the wider edges as another commenter (Ralph I believe) suggested, which helped.
Nice work here! Any chance you know what kind of motor they use in this toothbrush? I’m working on a project and need to find a small motor that has the intensity and ultra fast frequency like this motor does. Or can you direct me to someone who would know. Any help is very much appreciated. Thank you.
Thank you for the very detailed tutorial is disassembling the tooth brush handle and identifying the issue inside. My problem was that the handle was no longer charging. I had noticed that after brushing recently the handle gave the “low battery” warning by vibrating after the 2 minute cycle. After opening the handle, mine also had some corrosion and lots of moisture inside. Because the unit had still worked I assumed there was a problem with the connection between the charging coil and the rest of the unit. Sure enough, one of the two fine copper wires had corroded enough to disconnect from its post. Pretty simple to solder it back on. Thanks again for your post, otherwise I would have been out a $100+ rather than a couple drops of solder.
Thanks for the tutorial! My unit started turning itself off and on. I found a YouTube video that show the squeeze method for popping the bottom cap off and it worked the first time. I discovered drops of water inside the unit so I’m going to heat it with a hair dryer. It is still working fine and the battery is strong. But the seal at the tip is shot and I am also asking about getting a replacement seal.
I’d keep dryer heat as far away from the battery as you can- those things do not like to get hot!
Same with the seal- I’ve found suppliers of button cap on Ebay,but not the top seal
my sonicare with quadpacer tries to start each time I push the on/off button but does not keep going. I tried putting it in the charger and held the button down. It did the 2 beeps and the one beep (easy start). Anyway it does not continue to run. Any ideas?
Thanks a lot for this! For my sonicare, just a scrub down with alcohol did the trick. My tiny 15W soldering iron wasn’t up to the task of desoldering the battery, so I was planning on getting a new soldering iron the next day, but when I put the sonicare back on the charger after a good scrub and a night’s drying out, it worked again!
Pingback: Sonicare toothbrush teardown: microcontroller, H bridge, and induc ... | Electronics Infoline
Any idea what kind of push button that is? Mine no longer works. If I short the pins the toothbrush turns on so I know it’s just the button.
Looks like a standard tactile switch with metal actuator.I’d measure it and then find a similarly dimensioned one on Digikey/Mouser
Where can a spare button be obtained .
My problem is that the shaft came out when I tried to replace the brush. The rubber seal is ripped and needs to be replaced. Where I can find a replacement shaft with the seal?
I have been told by Philips that they control the parts and new parts cannot be obtained.
Hi guys, maybe one of you can help me. My Sionic Care stoped working after a 2 week holiday. I opened it, there is no signs of water damage, the battery shows 3.9V and the switch also functions correctly. Any ideas what component might be to blame? Any tips welcome 🙂
Pingback: Sonicare toothbrush teardown: microcontroller, H bridge, and inductive charging – KAYENRE Technology
I bought he Sonicare HX 6710 Feb 2015, it lasted until Aug 2017 then woke me up one night dancing around the vanity. Just turned itself on and would not stop until battery went flat – suspect shorting somewhere, moisture?
I paid R1195 for it from Dischem. I took it in for repair and heard nothing after 4 weeks. Today I went to find what happened to my unit and lo and behold it had never left Dischem. So, they gave me a new one (kudos Dischem) an HX 6711/02 and it cost R672.95! 2 1/2 years later and its R522 cheaper now – 44% cheaper!!!!
How on earth can the unit (same barcode) be 44% cheaper 2 1/2 years later????
Could you help me in determining the smd element?
sot 23-5pin B1**
http://kazus.ru/forums/showthread.php?t=117138
Running into similar problems with HX62xx series. Unit stops charging after about 2 years. I suspect seal problems. From the looks of the teardown, there is plenty of corrosion damage that makes getting a new head an attractive option. The amount of time consumed and the parts cost is pretty high. I found new heads on eBay for about $20.00, and fresh old stock units for about $30.00. The amount of technology inside is pretty incredible, especially the 16 bit microcontroller.