
Hot on the heels of a touchpad swap in my “new” Thinkpad T440P, come the next two upgrades: backlit keyboard and an IPS display. I shall call this machine Frankenpad as it’s rapidly deviating from the original configuration (20AWS series).
Keyboard swap
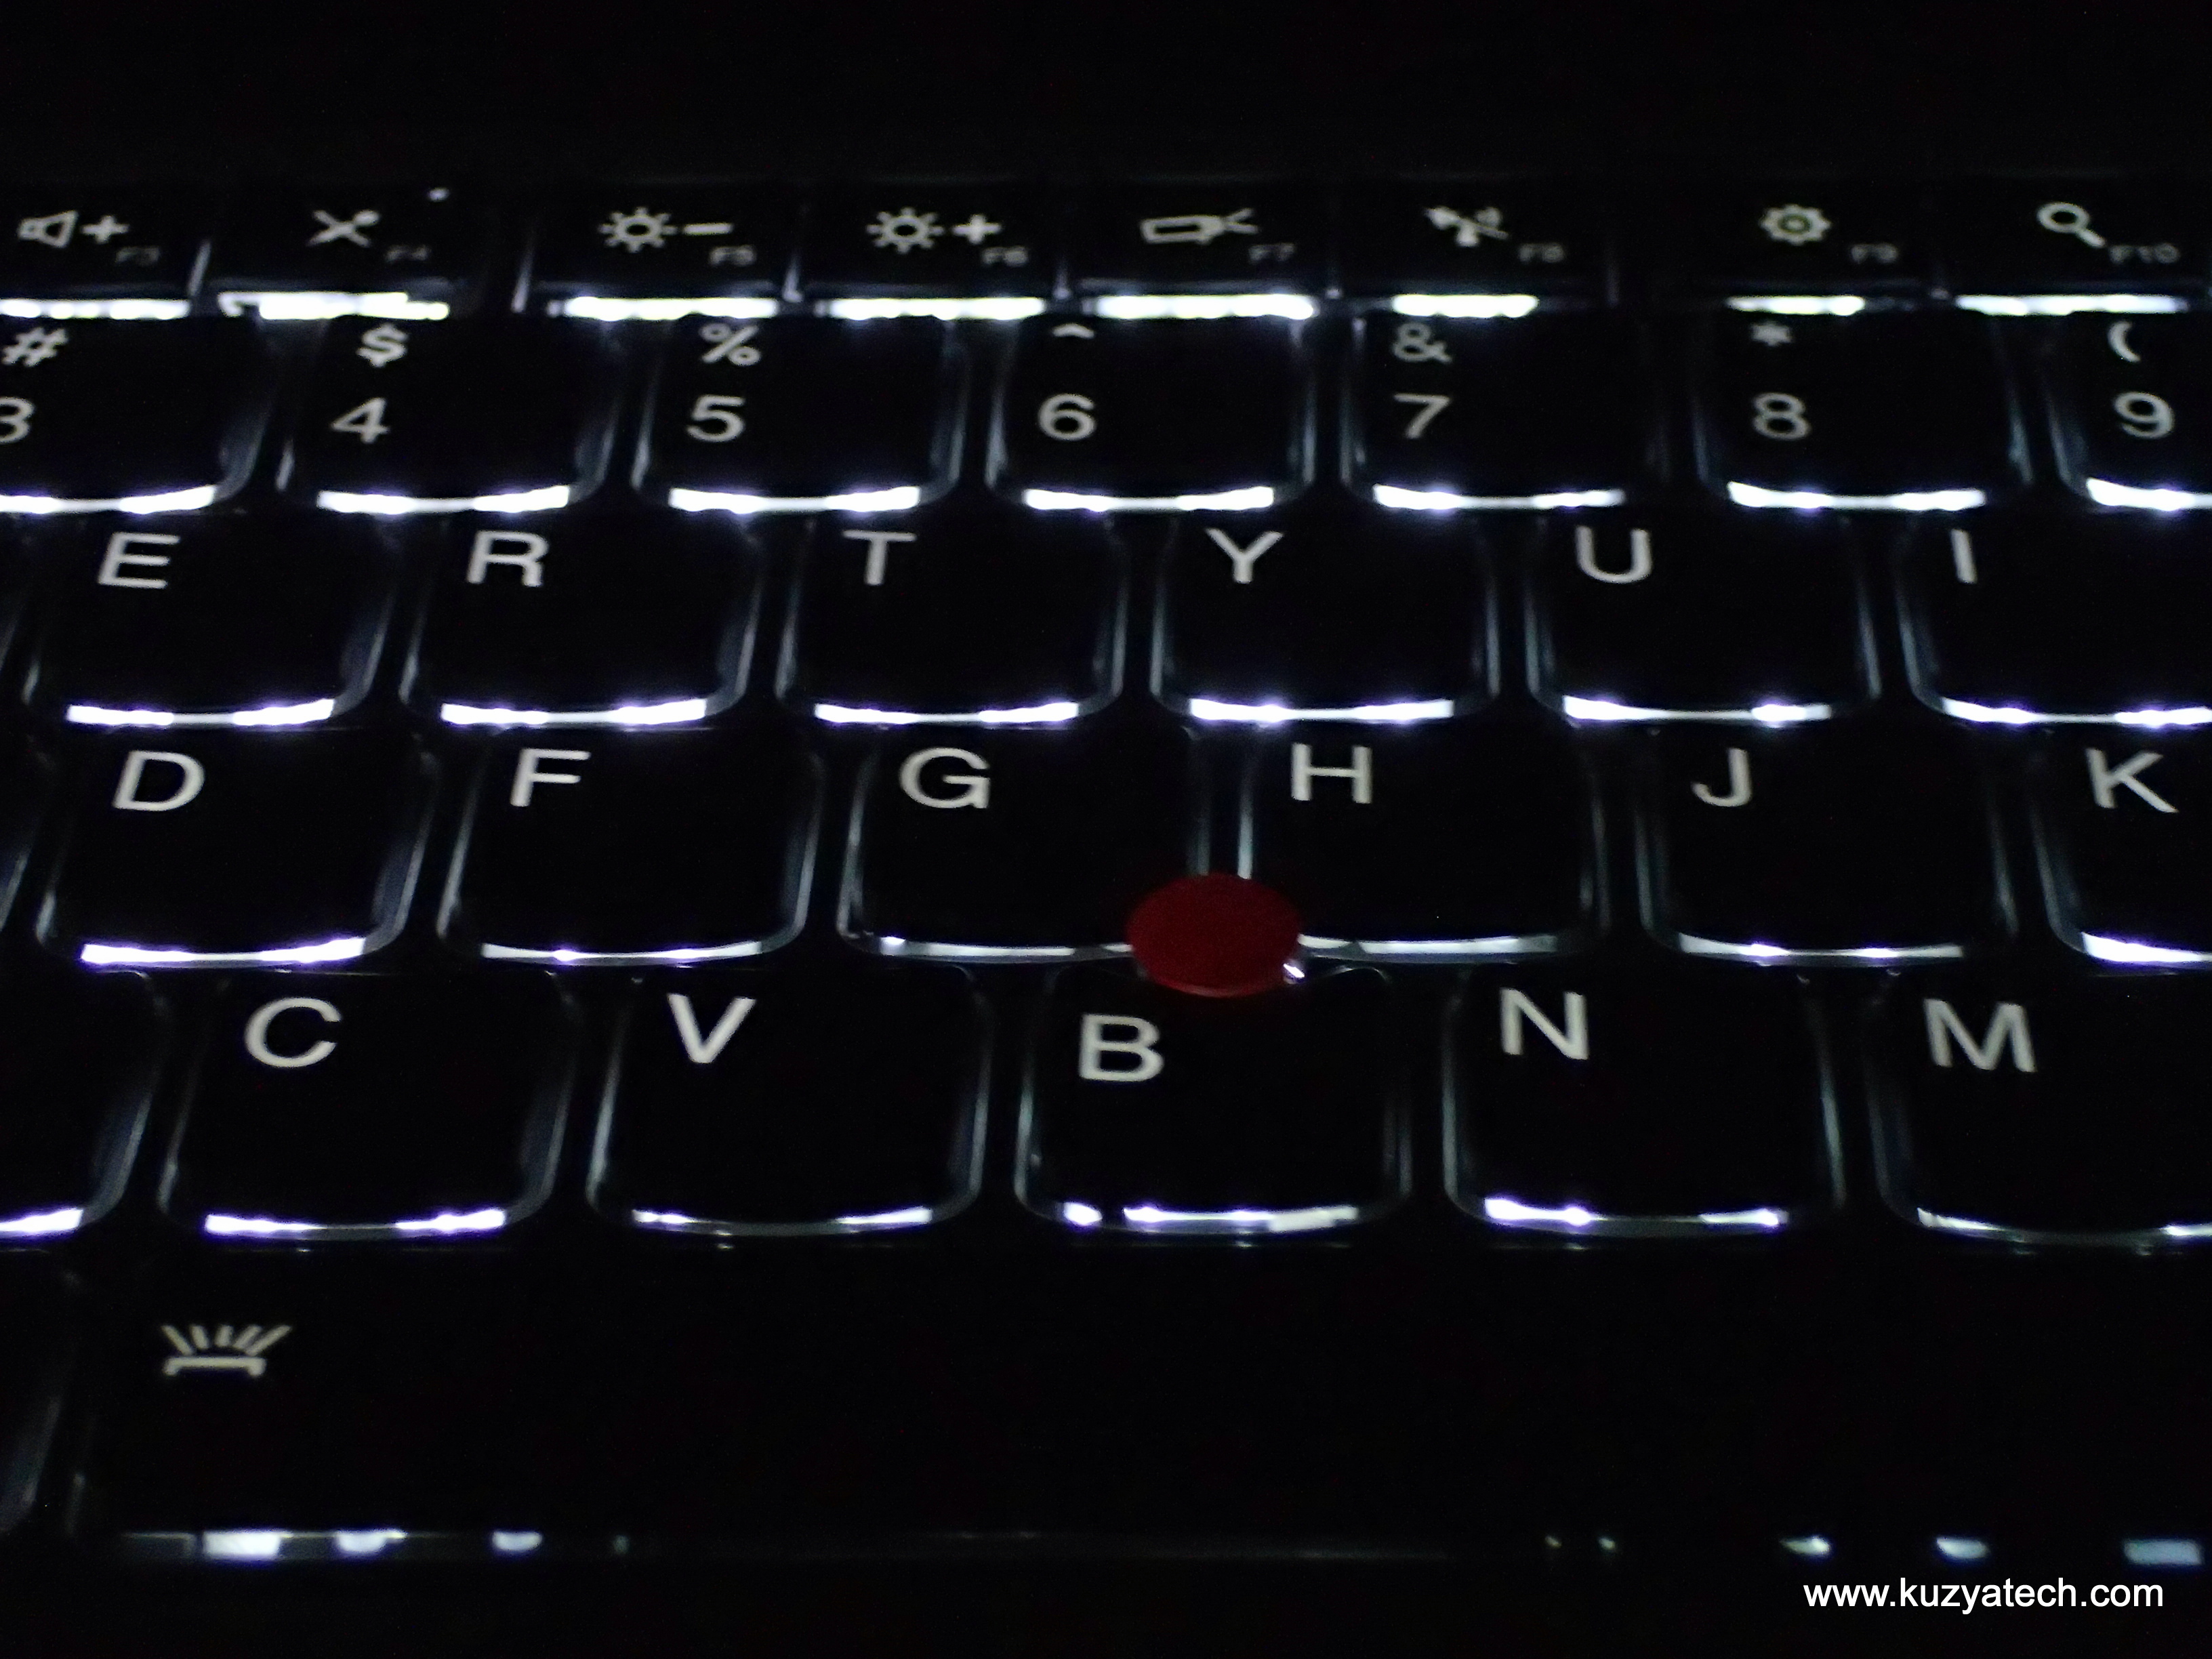
In my hurry to grab this laptop at a good price on ebay, I did not realize that Lenovo no longer includes ThinkLight on these machines. Once I stopped running around the house yelling “This is not a real Thinkpad if it has no ThinkLight!”, I cooled down and did some reading. ThinkLight is indeed not there but there is now an optional LED backlit keyboard instead. And of course my model did not have it. Luckily the keyboards are all over Ebay and there are several compatible P/Ns (Lenovo call them FRU –field-replaceable unit) that could be swapped in.
Lenovo has a handy web site at http://support.lenovo.com/us/en/partslookup to help you figure out those part numbers. Typing your exact Thinkpad model number will result in getting only exact replacements which is not very helpful if upgrades are in the plans. So for my machine, I simply used a more generic 20AW prefix. Selecting KEYBOARDS INTERNAL, lists all the compatible keyboards and from there it’s simple to find US and Backlit. Lenovo is even nice enough to list substitute FRU numbers and pictures of the actual keyboards with all the labeling, parts numbers etc
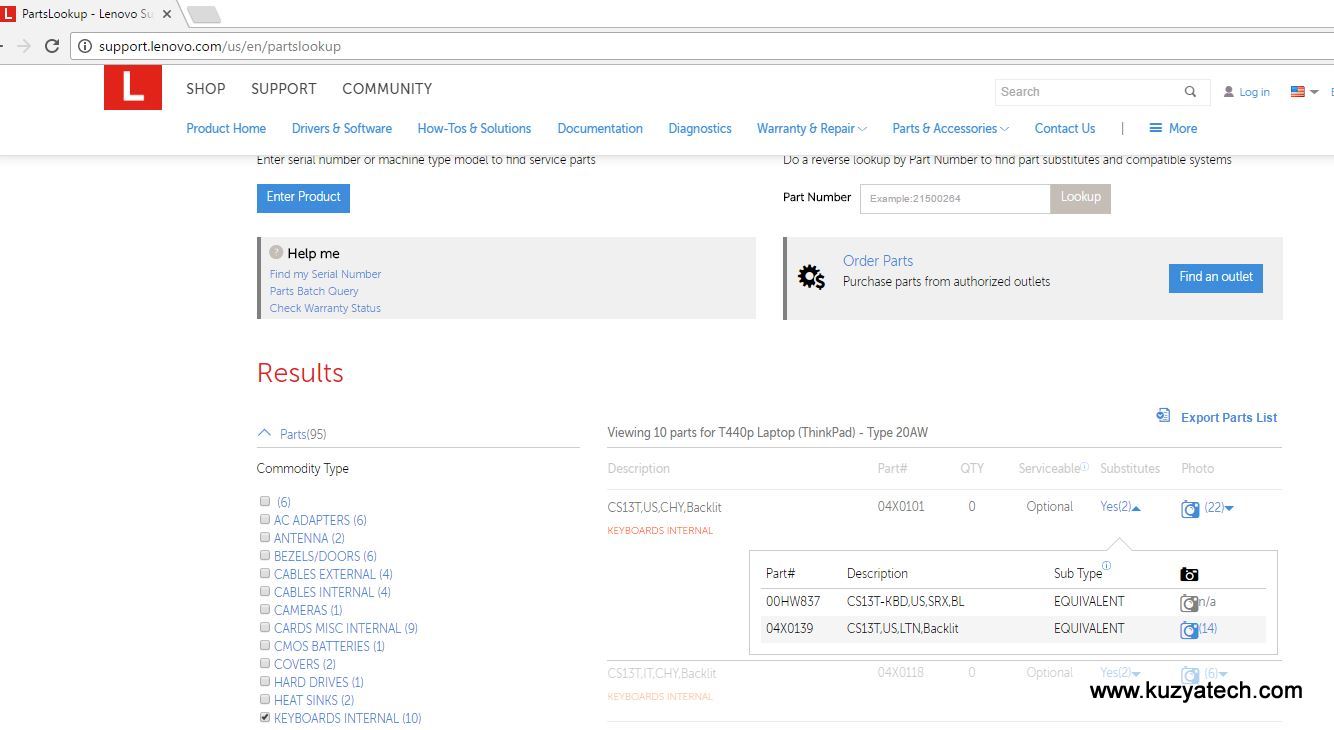
Lenovo FRU lookup
So the list boils down to three FRUs: 04X0101, 00HW837 and 04X0139 with plenty of hits on Ebay
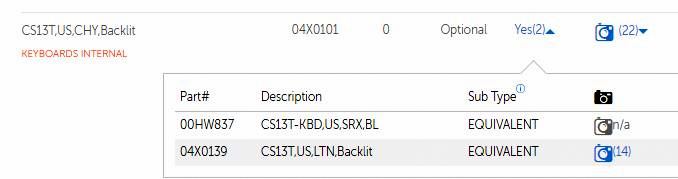
Keyboard part numbers
Keyboard replacement procedure is pretty well documented so I am omitting it here. You basically slide the plastic keyboard frame up using some non-marring plastic tool like a spudger a bit so it goes under the keys and six screw heads get exposed. Unscrew them, disconnect two flex cables, transfer a sticky rubber pad to the new keyboard cables and reassemble. (See page 67 of Hardware Maintenance Manual). Just make sure to power down and remove battery!
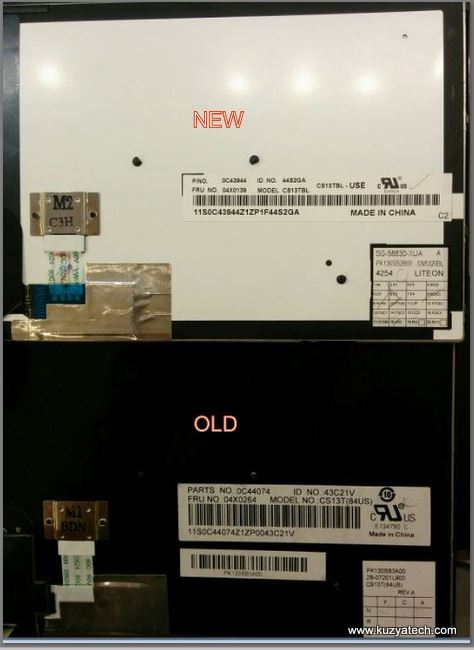
Old and New keyboards

Backlight is indeed nice
Display swap
This is where it gets a bit more complicated. The actual replacement is fairly simple thanks to the good design of the machine, but picking the right panel is non-trivial. Many vendors will gladly sell you compatible replacements, which may be OK if you are not very picky. But if you are, you better know manufacturer part numbers you want. (Or buy an actual Lenovo part, either as a pull or new). Also, only Genuine Lenovo parts will have proper Hardware ID set in the EEPROM to be correctly identified by the drivers. If you use the same panel, but not Lenovo branded, it will have panel manufacturer’s ID inside and may require a bit more hand holding during driver install.
Using the same handy Lenovo parts lookup, LCD Panels section, we get three top level numbers
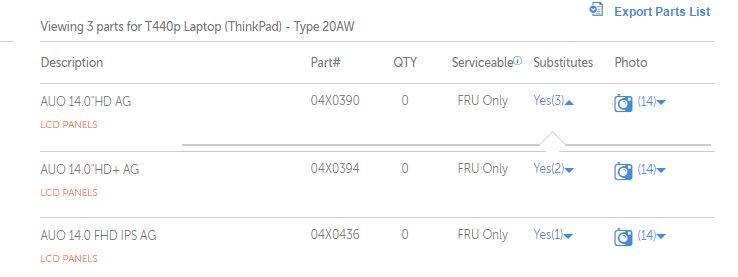
Primary LCD FRUs
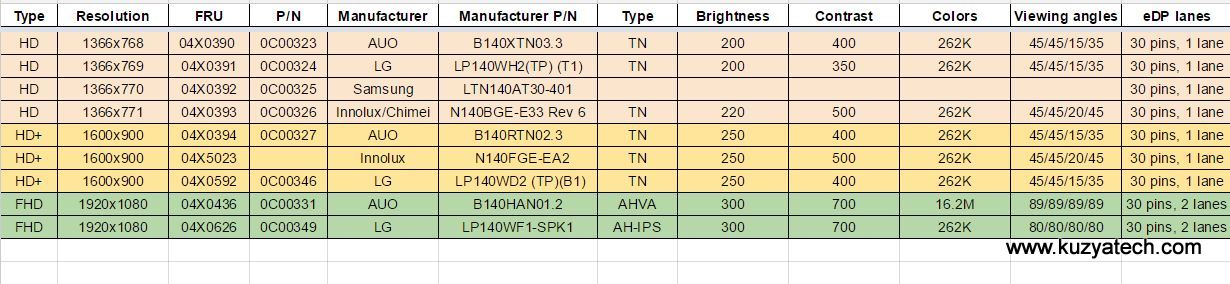
Each one has several substitutes listed. So after going through all of them and looking things up at Panelook, I ended up with a handy table of panels:
LCD panel choices
Notice the last column listing interface type. Up to 1600×900 screens use a single eDP lane, but they go to two at 1920×1080. Luckily for me, the cable in my machine had both lanes present. I do wonder if anybody would bother not populating two wires on a cable and then carrying different part numbers in general, but you never know. For those interested in more details, I stumbled on this handy presentation describing LVDS to eDP transition.
Since I was looking to go from 1366×768 to full HD (1920×1080) IPS panel my only choices were the last two rows:
| 04X0436 | 0C00331 | AUO | B140HAN01.2 |
| 04X0626 | 0C00349 | LG | LP140WF1-SPK1 |
Of these two, only the first panel provides a full 16M colors gamut, so I settled on the AUO. A barely used one popped up on Ebay and I grabbed it. The install was fairly trivial as well:
- Turn power off and remove battery
- Starting from inside edge and using just your fingers, pry the display bezel out to disengage the clips
- Remove four screws, flip the screen, lift a metal clip and disconnect the cable. Reverse the order to install the new panel.
On boot, a few things had to be done:
- in BIOS set memory allocation to 512Mb from 256Mb it was set to (otherwise screen goes blank when Windows starts
- In device manager under monitor, select Generic 1920×1080 60Hz digital panel (unless your panel is Genuine Lenovo with proper HW ID)
- You may want to uninstall and reinstall display driver. Until I did that I was getting screen flicker on waking up from sleep
- Enjoy!
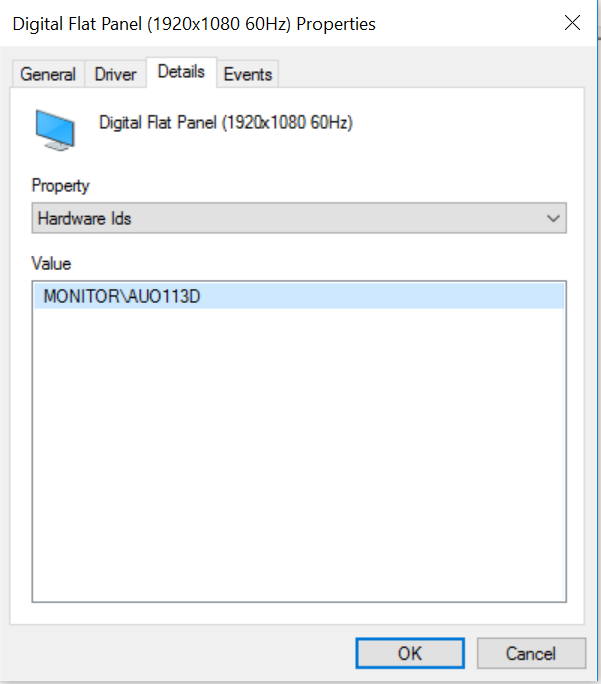
Hardware ID reported. On a Genuine Lenovo panel it’ll look like Monitor\LENxxx
Results
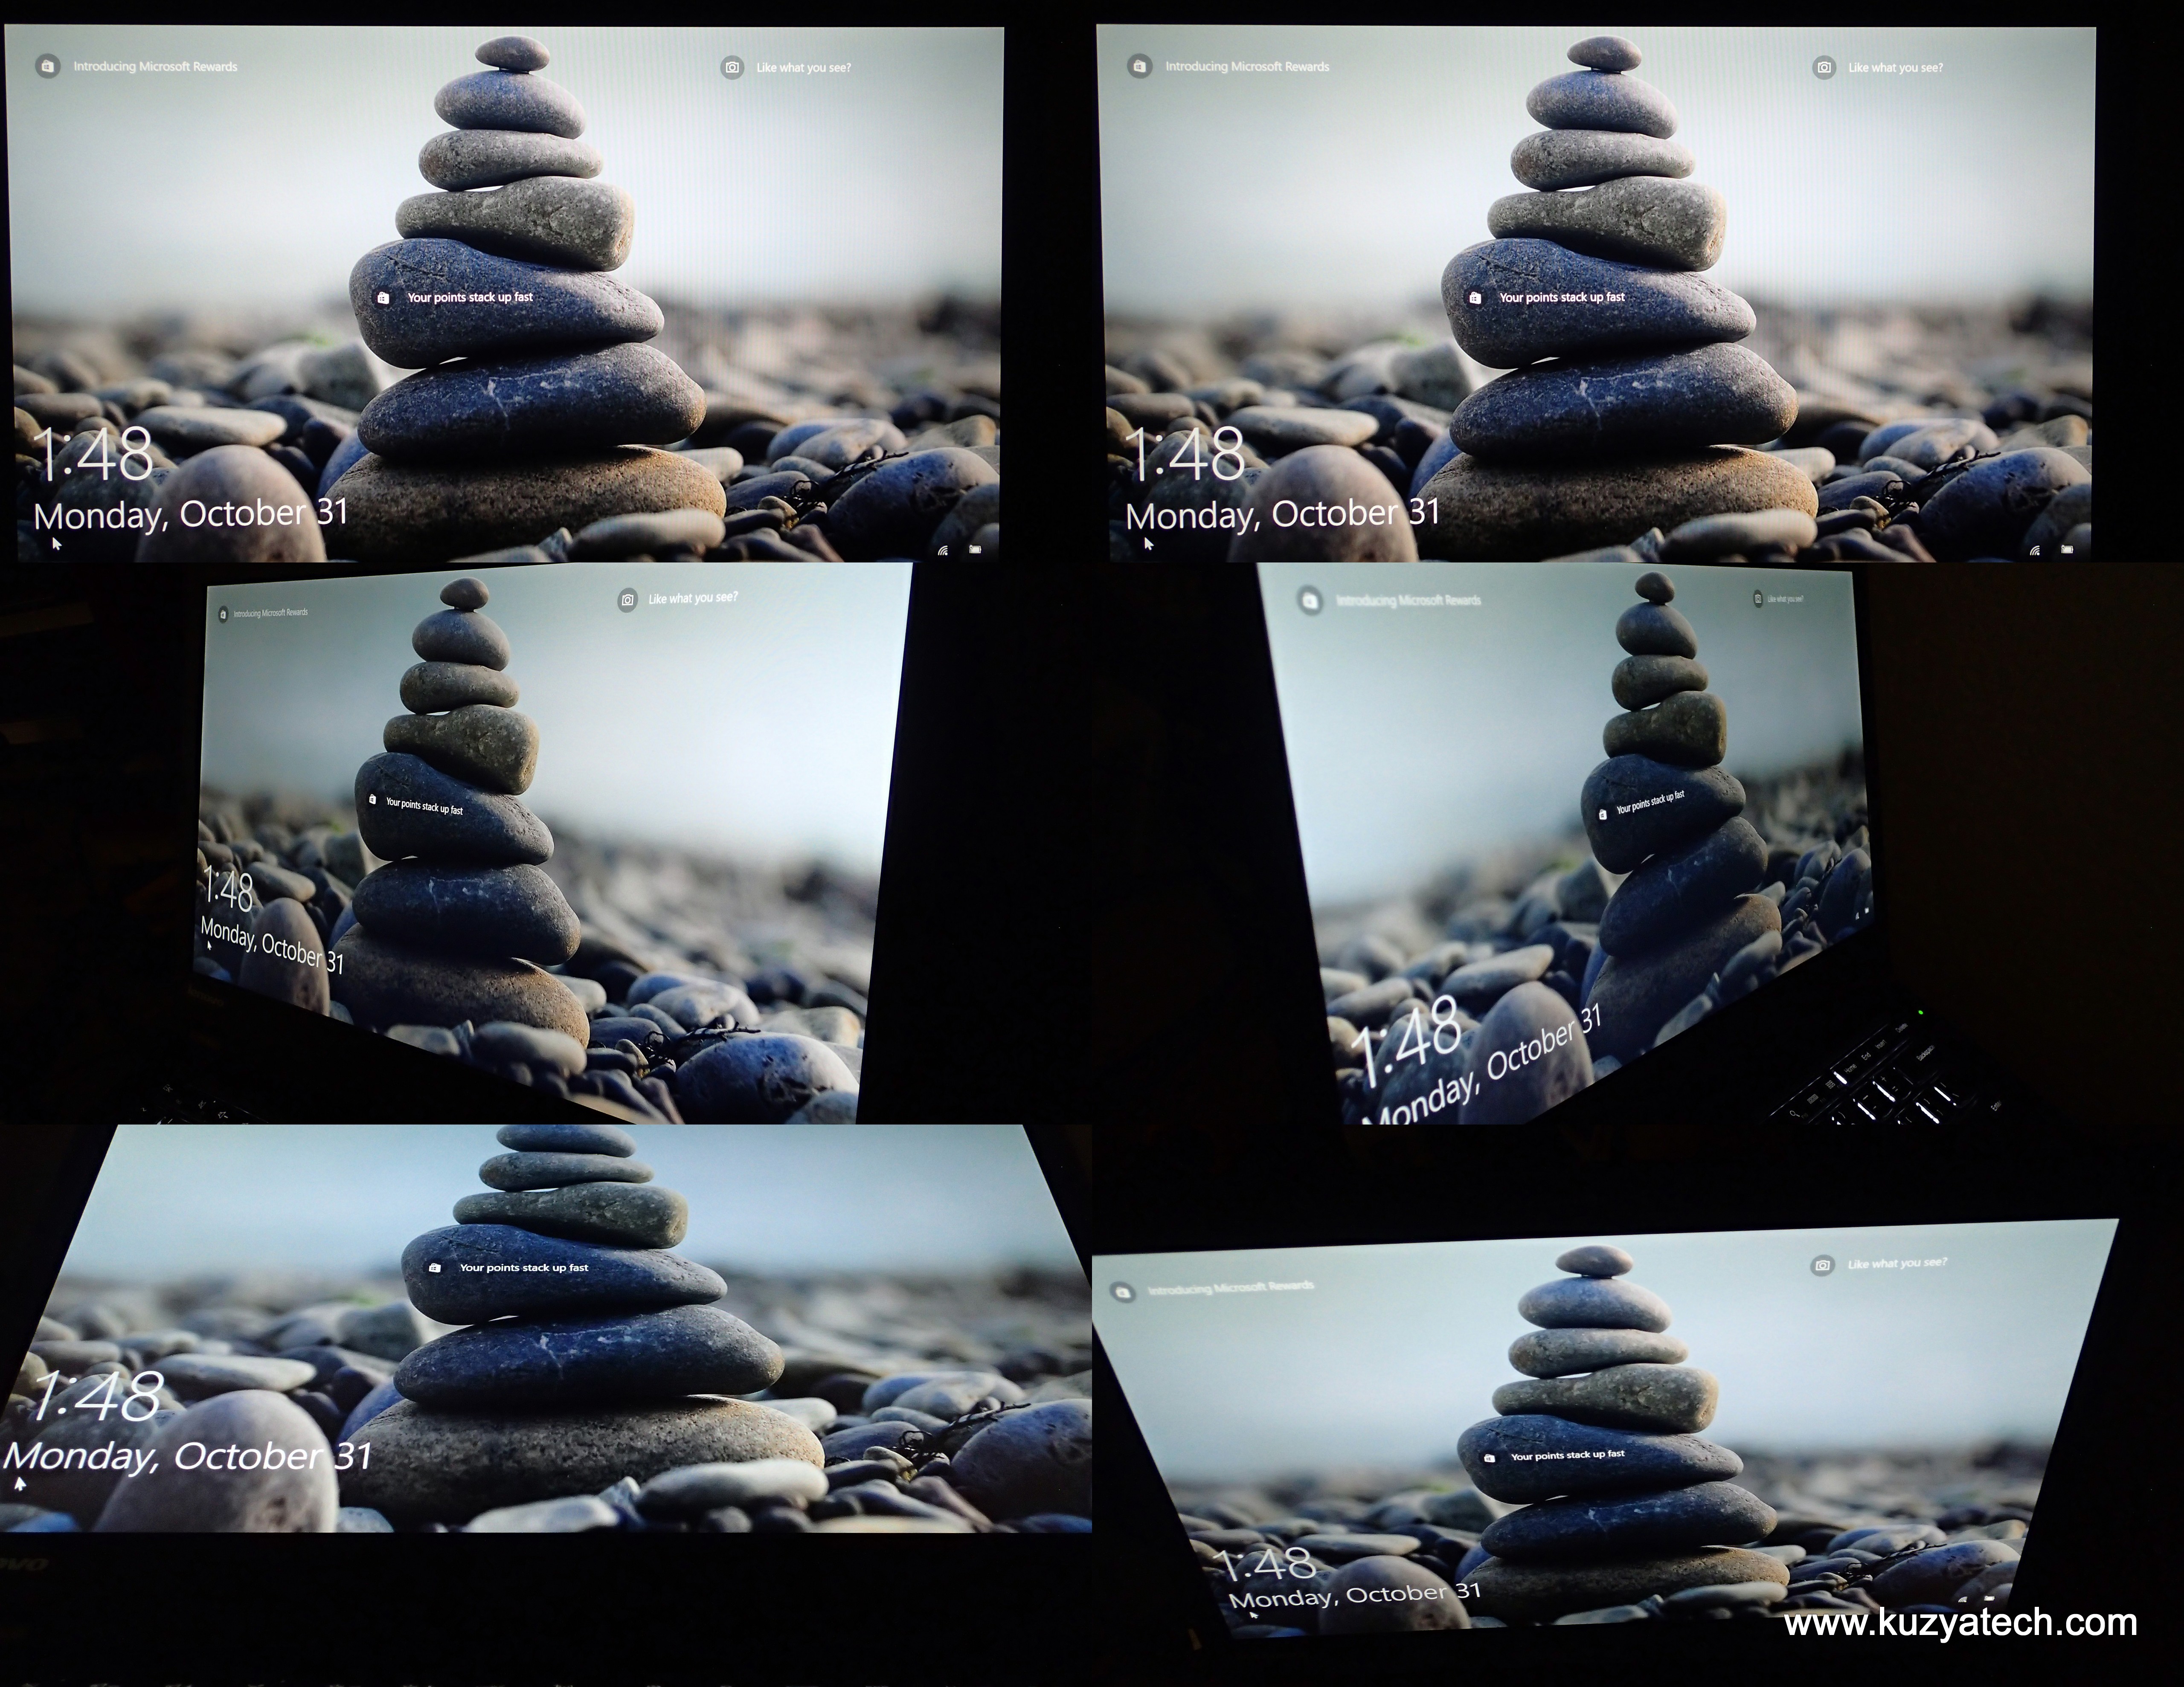
IPS panel viewing angles. No color or brightness shift
With these upgrades my T440P went from a “meh” machine to a very enjoyable laptop. Screen is very bright and sharp and its colors do not change no matter what angle I look from. And the best part it was not complicated or that time consuming to make it fit my needs, thanks to good design decisions by Thinkpad engineers.
Disclaimer
These upgrades and part numbers worked for my machine. Yours may be different enough to require something else. So proceed on your own risk.
Resources
-
Lenovo T440P FRU BOM for 20AW and 20AN series
-
Lenovo Thinkpad PSREF specs
-
Lenovo Parts lookup
-
Lenovo Thinkpad T440P HMM
- Reddit thread on screen upgrade
-
eDP presentation
- My touchpad upgrade post