Part 1- getting the platform
This all started when we bought a house and it came with a bit of grass. And grass wanted to grow and had to be cut. Initially I paid a lawn service to come and cut it, but they kept cutting bits I did not want them to. So I looked at the annual amount I was paying them and decided that would be my budget for a mower. Being an electrical guy, I very much dislike all things gas powered, stinky and noisy. So the absolute requirement was for the mower to be electric. I looked around a bit, and my choices seemed to be a bunch of no-name large box store mowers running Lead Acid batteries or corded, a few exotic European market-only Lithium powered mowers or making my own. I picked neither
For a while, I’ve been looking around Craigslist and Ebay, looking for broken gas mowers to convert. Instead I’ve stumbled on a new old stock Canadian Yardworks cordless mower on ebay. Price was right, so a week later I had my first electric mower. That would save me the hassle of finding the correct motor and machining the bits to mount it on a gas mower deck. It was not clear how long it was sitting somewhere, so I did not have high hopes for the batteries.
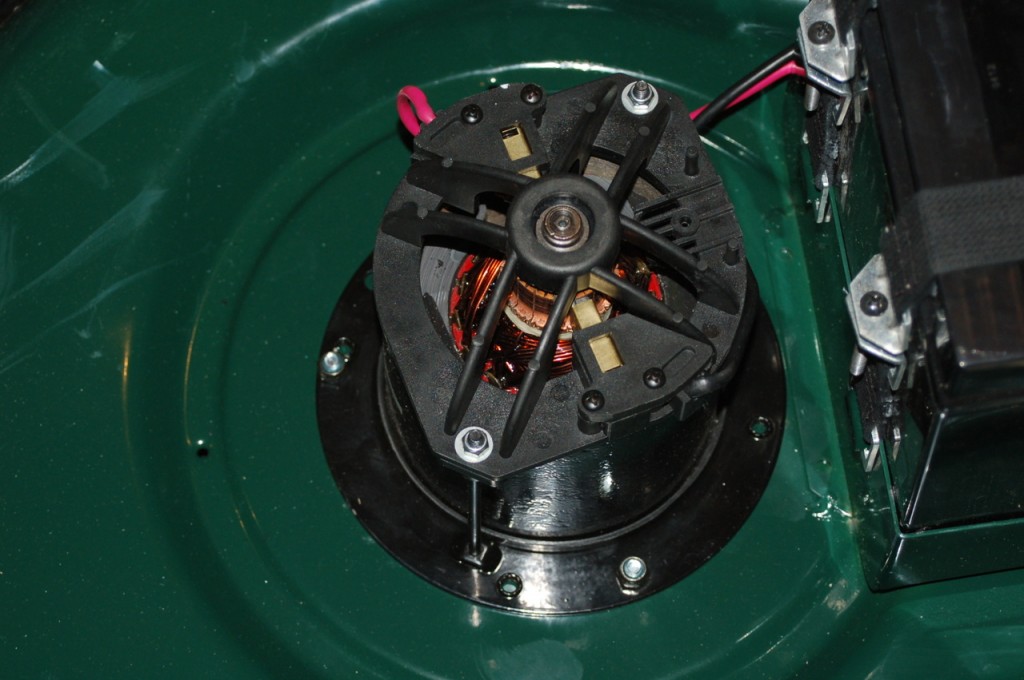
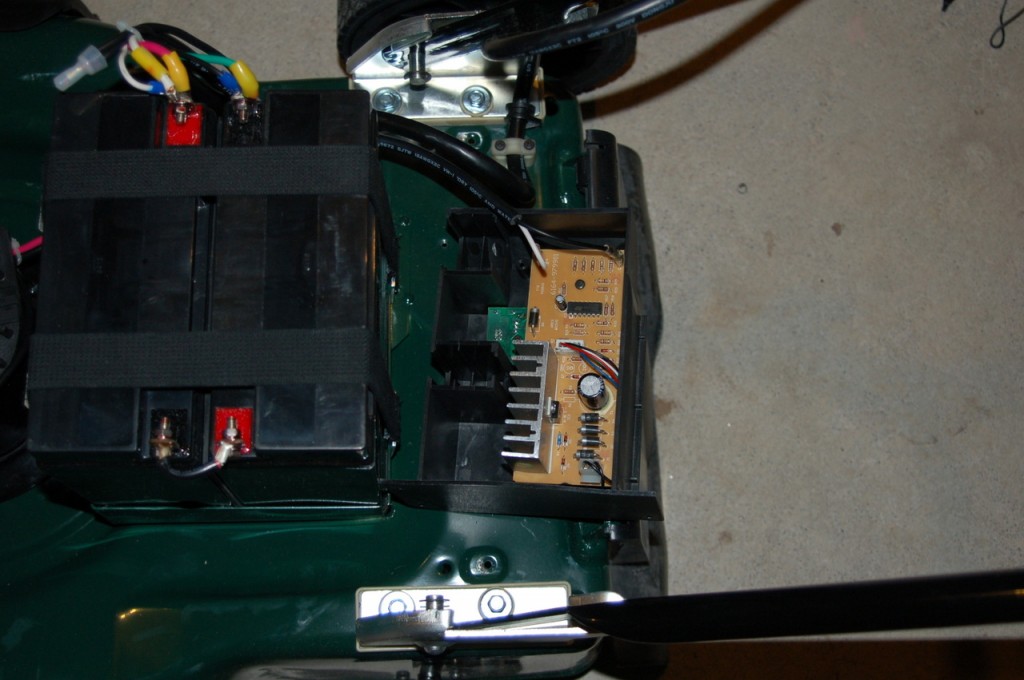
Of course the first thing I did was take the cover off and see how it was made. Overall build quality wasn’t bad, with clean wiring and loctite on all screws.
It appears the deck is indeed a standard thing, used for both gas and electric mowers, they just bolted an appropriate DC motor in, driving the blade directly. The motor is powered by two 12V Lead Acid batteries in series. There is also an integrated charger on board, that uses an AC wallpack.
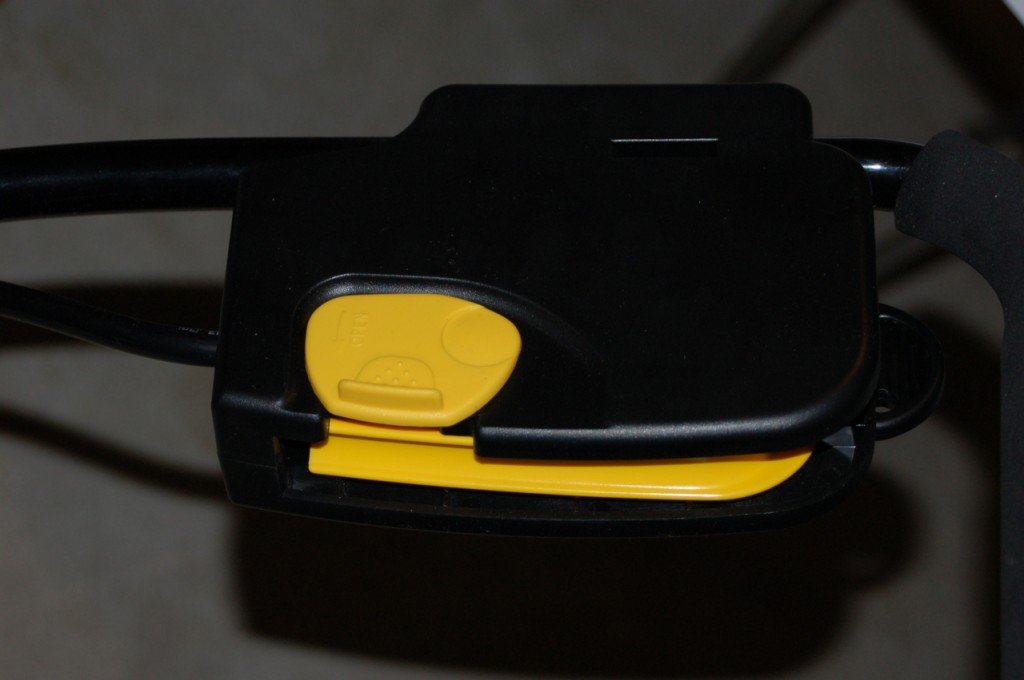
Overall design is pretty simple- two batteries are connected in series and power the motor through a pretty nice safety switch with a key interlock.
When the batteries are low, motor stops and you have to plug a wallpack to charge. I charged things up and it fired right away. For about one summer I’ve been using it as is and it performed reasonably well. Towards the end of the season though I started seen pretty significant voltage sag, and the run time kept falling. Finally one day one of the batteries vented- it blew the plastic cover off covering the cell vent. I took it as a sign it was time to update things to 21st century. An obvious choice was a Lithium ion pack, but that does come with a few considerations. It has to be able to handle rather high discharge currents, provide voltage in a safe range for the motor and stay overall safe. That lead me to the Iron Phosphate chemistry, ( or LiFePo4). The Iron Phosphate cells are relatively easy to keep happy- just avoid overcharging and over-discharging and keep the cells balanced in a pack and they will serve well for a a long time. I just had to size the cells correctly and use a proper BMS .The original pack was two 17AH 12V SLAs. My replacement was going to be an 8S pack of 10AH cylindrical cells.. The voltages would be approximately the same, plus I was banking on the LiFePo4 pack being able to sustain a much deeper depth of discharge and deliver its full capacity. SLAs typically can not do that as they provide less and less capacity at higher currents. This would also cut the weight of the pack quite a bit. My two old SLAs together weighted 24 Lbs. The new pack would be in a 6-7lbs range, making the whole thing significantly lighter. After lurking for quite a while on the Endless-Sphere ebike/battery forums, I’ve learned that I can get this kind of batteries ordered direct from China from a company called Headway.They were 38120 form factor- meaning 38mm in diameter and 120mm long. So I ordered the batteries, charger and BMS from them and prepared to wait.
Part 2- batteries arrive
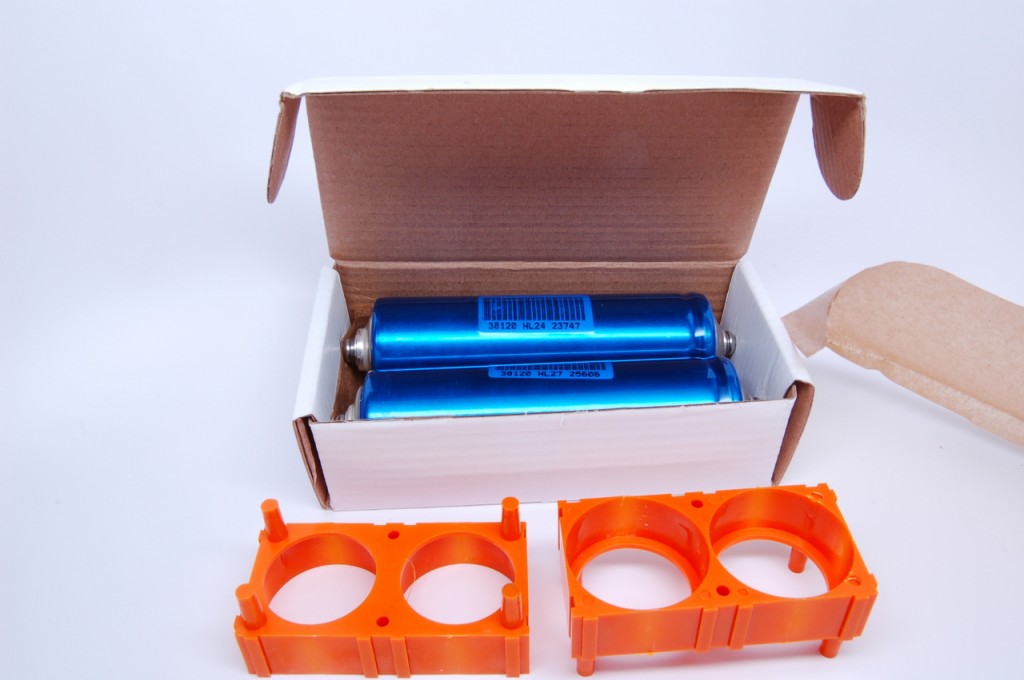
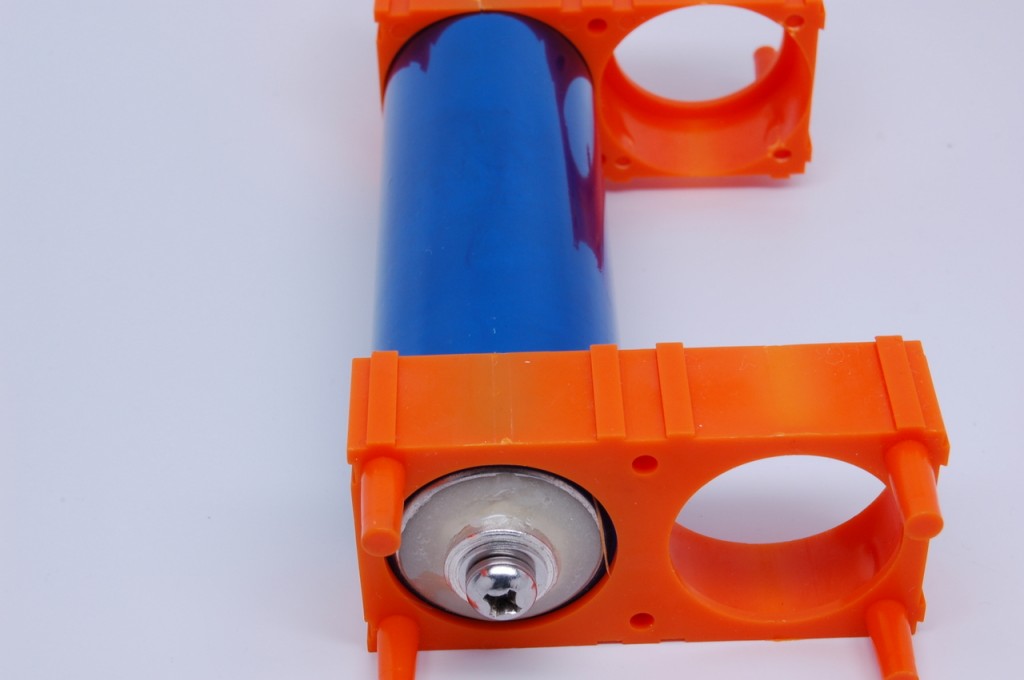
The wait was about a month or so, but the batteries eventually showed up. Packed in pairs and loking pretty good:
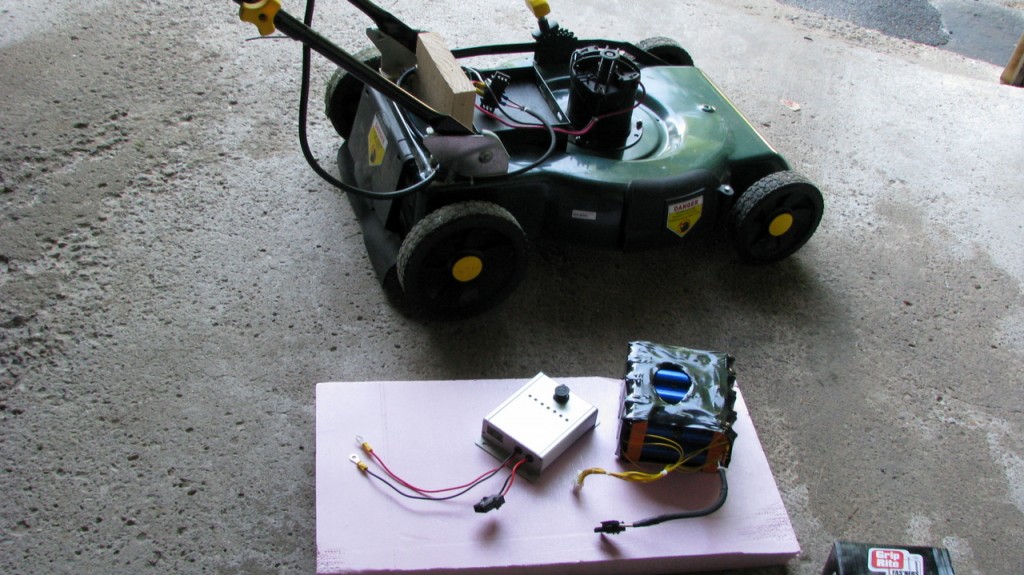
The holders are a bit too tight, cracking if inserted all the way in. But the overall concept is very nice- you can build any pack configuration just by snapping blocks together and bolting the connecting bars to the threaded ends of the cells. I proceeded to build an 8S pack, charged each individual cell with a lab power supply and hooked it up to the mower through a Watt’s Up Meter to log current/voltage and charge. I waited for grass to grow a bit and did the first test run. It was a resounding success- I saw no voltage sag or motor slowdown no matter what I was cutting. Things just stayed pretty constant and perky all the way through my 0.25 acre plot. As the Watt’s up meter started approaching 8AHs sent to the motor, I decided it was time to stop. The concept seemed workable, now I needed a BMS and a charger. Incidentally, I ordered those with the cells, but they did not ship together. A bit more waiting and they finally showed up. The charger looked OK, though I did not care for the IEC style plug at the end of its output cord. Around here we use those for 120VAC, not 29VDC.
Part 3- custom BMS
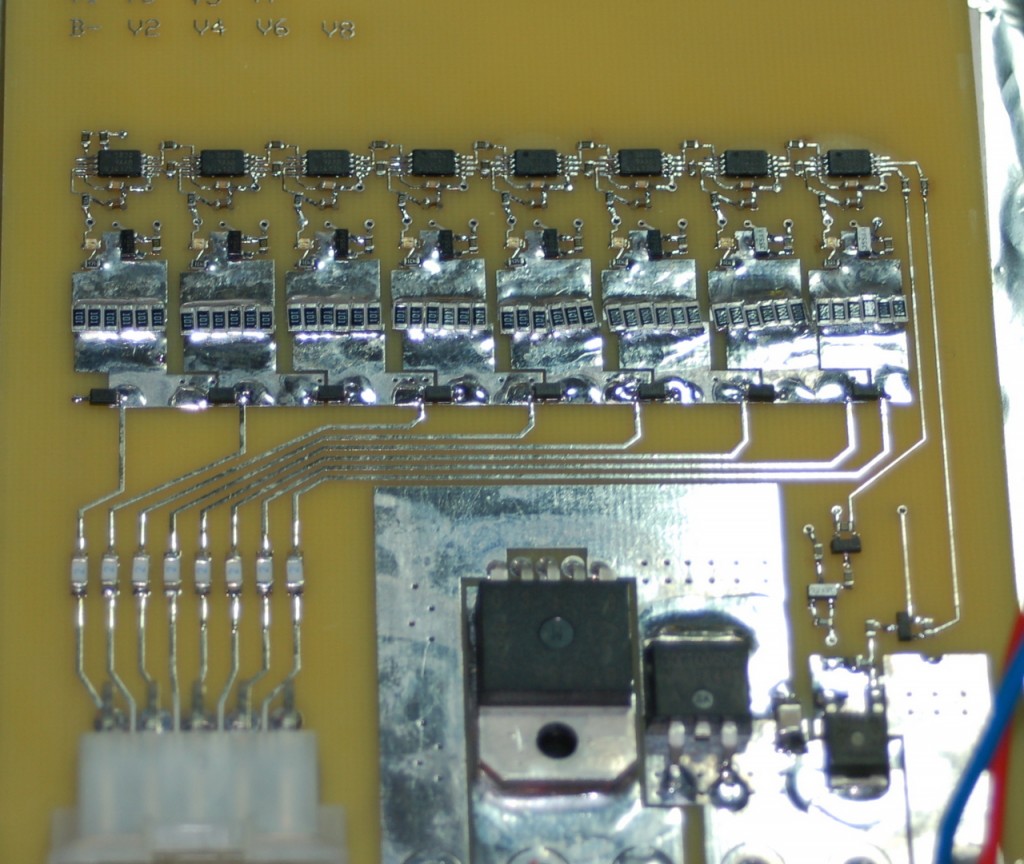
Looking at the BMS that came in, I felt less than confident that i can trust it to protect my rather expensive batteries from real life perils. So I decided to make my own. I picked a Seiko S8209 chipset to work with as it provided all the features I needed in a very simple package- OV and UV are laser trimmed to a particular voltage, balance control is integrated and you just get two status lines upstream and two downstream. Armed with a few samples of the chip, I went to work. I’ve used ExpressPCB for the PCB design, so to stay cheap I picked their standard service with no silk or solder mask.
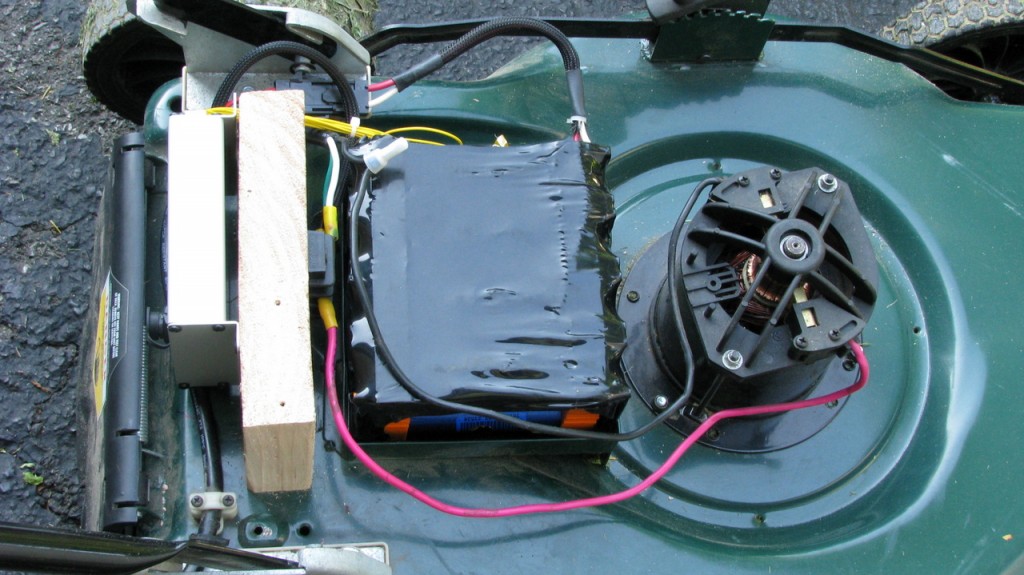
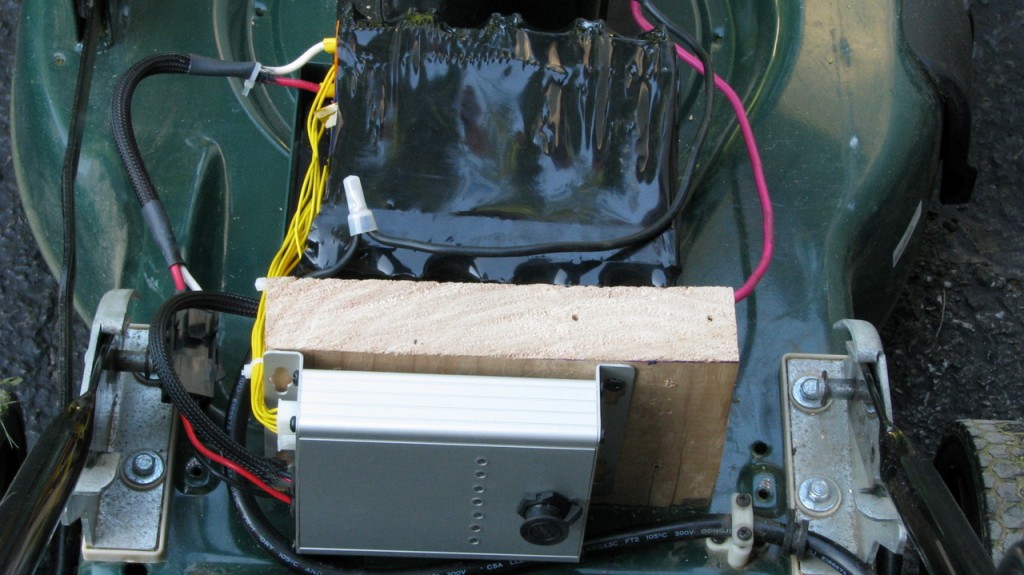
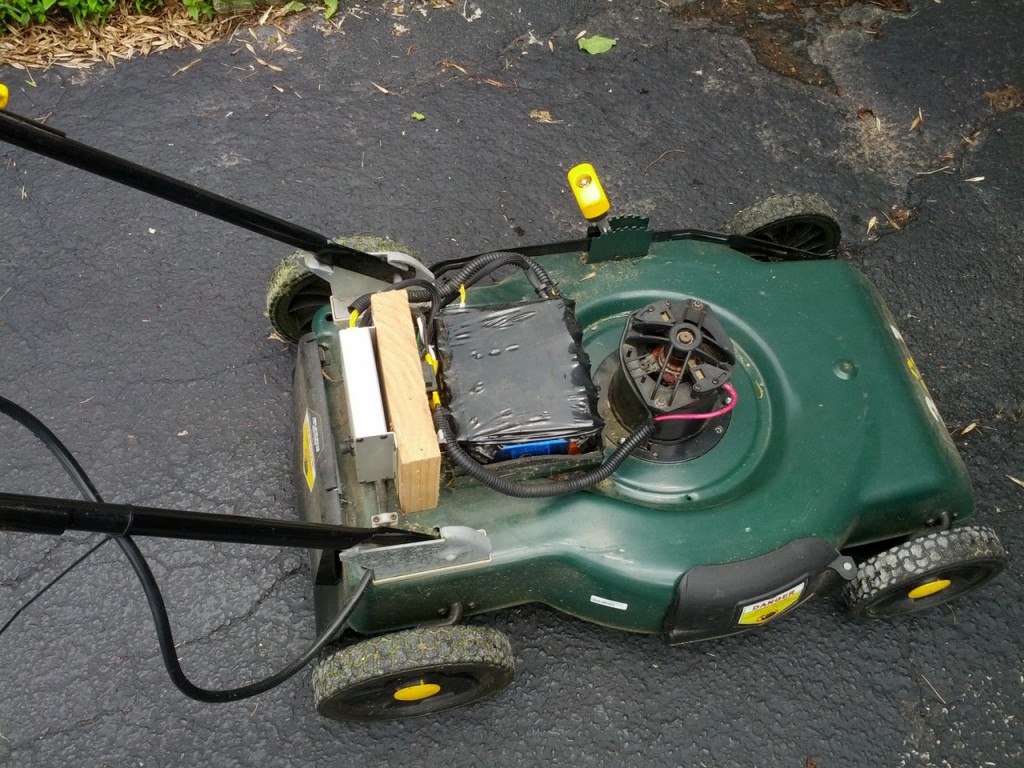
I ended up using an Infineon BTS555 power switch as a high side load disconnect. They are a bit pricey, but in all my designs I’ve done using them on military projects, I’ve never managed to damage or kill one. Built like I tank is a good description for them. I also use a smaller FET as a low side charge disconnect. Both are controlled by the Seiko chips. Being paranoid type I am, I added series fuses on all cell lines. Balancing resistors were supposed to be 2512 size resistors. Somehow I forgot to order those. So in go 6 1206 ones. If anything, I get better heat distribution as the spread around a larger area. I designed the board to fit into an extruded Hammond box, and put some lightpipes on top of the balancing LEDs. The connector in the middle is a Switchcraft sealed model, that’s my charge port. Two lugs go towards the motor and the Molex MiniFit Sr is the battery connection. I also wired the cells with individual sense lines and brought those to a Molex MiniFit Jr connector. The pack is wrapped in a heatshrink, that got a bit too shrunk. Woops.
Conclusion
It’s been over two years since I’ve completed this project. The mower is still going strong and the cells are well balanced. It is also very quiet, and emits no smell. Perfect for having other family members volunteer to cut the grass!
I do wish I’d get some sort of state of charge indication short of the motor stopping when I hit UV on one of the cells, but that may have to go on a wish list. If anybody is interested in more technical details about the conversion- let me know.


I would love to get more details on your conversion as I am in the process of converting a ryobi 48V SLA lawnmower to Lithium based battery power. What was the cost of the 8s battery pack you chose to go with and what kind of AH rating did it deliver?
These are 10AH Headways, they were around $16-$18 each direct. The air shipping from China was rather pricey. There are now US based sellers offering them. I do get the full 10AH out of it before the BMS undervoltage kicks in. It also runs much nicer with less slowdowns when loaded. The pack is just big enough for my 1/4 acre yard, but one time I ran out before completing, the 5A charger made for a pretty quick recharge
What does BMS stand for?
Battery Management System- its role is to maintain the pack in a safe voltage/current/temperature range
I landed on your page after Googling about batteries for these machines – I inherited one because (it was said) the batteries are bunk, which indeed turns out is very common for this mower. However, after separating charging and checking the set they both seem fine – yet no power gets to the motor… Fuse is good, wiring is good so I decided to try putting the voltage directly to the motor contacts – and voila! nothing.
Unless I am mistaken, shouldn’t it at least try to spin up when hooked directly to the batteries? There’s no sound, no nothing – the brushes look to be ok, I haven’t pulled the motor right out yet because I figured maybe I’m missing something obvious? And of course I’m asking you because you fought the Yardworks and won =D! Meaning you’ve actually seen the exact motor/setup I’m talking about, you’ve proven you know what you’re talking about AND you’ve done to these mowers what I had hoped to do to mine (until it turned out to be an issue seemingly not the batteries….yet)
I’ve read on another site about 24v dc wheelchair motors having some kind of brake system involved – do ours have the same thing? Apparently this brake can lock the motor up tight but I can’t see why a lawnmower would need a brake – that’s what your feet are for no??!
Hi,
yes it should spin when connected.Were you actually seeing voltage form the batteries when you connected them to the motor directly? Have you tried checking resistance of the windings with a multimeter?
The only brake I saw in mine was inside the handle switch. Basically whenever the mower is off, the motor winding gets shorted to make it stop right away instead of spinning for a while. That’s more of a safety feature
No machine should be braked,it should come to rest naturally.
Some mowers have some sort of motor brake,usually be placing a dead short accross the motor. This is very bad practice,high mechanical stree on the windings and will lead to the magner being demagnetised.
Every mower I get for test has to have this removed, motor than stops after a few seconds.Mowers with induction motors use electromagnetic friction brake,which is not too bad.
I have a 48V10ah Ryobi mower that Im converting to LiFpo4.
The BMS cuts power as Im assuming the motor is drawing to much current.
Without the BMS it runs like a helicopter. I want the BMS so Im thinking i need a voltage/current regulator. You agree?
Nice to have stumbled on your web site. I was wondering if you could tell me the specs of the 24v motor? Also, have you ever measured the amperage draw idling or under load? I’m planning to use the same motor on an electric bike, and probably the same batteries. Thanks!
Hello, what is the typical resistance for these motor windings? I have a 48v Ryobi that decided to quit on me. Battery reads 25v in each bank, the mower connects the two batteries into series to make the 48v it wants. The motor showed around 1ohm, I figured it was shorted, as when trying to run it, nothing happens but the built in battery meter shows the battery goes down. Disconnected a resistor I figured is wired in parallel for soft start then opens as the ‘throttle’ is further pressed, as the switch sounds like it makes more than one engagement through it’s range. Tried again and the battery still showed a drain. Bought a new motor, the windings are near the same value (3 ohms). Installed it, same problem. Hardwired power to the motor, nothing. Wondering if the new motor was already shorted, or something else is happening. Could the lead acid batteries somehow show good voltage but still have a very limited current supply? I believe I have seen car’s have 11v on the battery and not turn over, not even engage at that. Very surprised a ‘blown’ battery can show a healthy 25v each bank and not even get a blurp from the motor before giving up.
Hello,
Great article. Thank you for posting.
I was wondering if it would be possible to get the details of the BMS that you created? For example, the schematics and parts list if possible.
Bradford
I too am a Ryobi -48v owner wanting to change out battery to a higher Amp/hr. Wanted to know the pin configuration of the contacts on the mower for the battery pack. Would also like others converting their Ryobi to email me and maybe start a blog for informational purposes.
Jean Gaye’
bileaux@hotmail.com
Hi.
Is it possible to get a complete kit to replace the lead batteries to lithium batteries in a 24 volt homelite mower as i am not an electrician? And i also live in good old Australia? I am just about to replace my lead batteries at $89.00 each.If a kit is available where can i get it and at what price??
Regards
Colin King
The batteries for sale at Headway are 3.2 volts?
Don’t you need two 12 volt batteries?
http://www.headway-headquarters.com/38120s-10ah-headway-energy-cell/
The price is $19 for a 3.2 volt battery.
I am basically making 24V out of 8 Headways
I see, so 20 dollars times 8 becomes quite expensive, almost as much as replacing the lawnmower, or more expensive than replacing it…. $160 just for the batteries, not including all the circuitry. Headway circuitry seems expensive to monitor and control the battery.
http://www.headway-headquarters.com/bms-and-pcm/
The bms and pcm circuits are $100 or $346, etc.
This gets quite costly… almost as if the battery replacement job totals up to more than the cost of a brand new lawn mower… You probably saved money by building the BMS/PCM yourself. But still to spend $160 on a battery set up for an old mower.. when car batteries only cost $80 canadian back in the day when my batteries failed in my cars…. Why is it costing $160 USD just to fix a lawn mower. I can see why people use Gas mowers.
I did not have to buy batteries, but the rest of development cost a pretty penny as well. For me gas mower is simply not an option- I am not walking in its exhaust cloud..
Lead acid batteries were an original option, but much too heavy and low capacity to be useful.
Hey Reagle,
Awesome post on your website here. Looks like the wealth of your experience has helped quite a few industrious people. I’m a mechanic willing to give a different technology a try, wondering if you have time if I posted a few more questions as my parts come in. I’m mainly interested in expanding my noobness when it comes to the design of your most excellent charge controller or BMS. I recently purchased a solaris sb21hb that came with sulfated Pb batteries….
Headway now sells complete kit of 36 volts, 48 volts with bms and connectors.
Priced in 500$ range. Look at their site.
I got hold of an old 24v Yardworks mower, with missing (probably dead) batteries. So I got some 15ah 12v LiFePo4 batteries in series to power it, which worked well for 1/2 the yard … then one battery died (BMS). I know I am exceeding the recommended C discharge rating (the mower draws 30-40 amps when mowing) I got a replacement LiFePo4 battery, but now am a little concerned that the high discharge might kill or reduce the lifetime of the batteries. Also noticed that hooked in series they discharge different amounts 2.7ah & 5.1ah (same manufacture & dates) Aren’t the BMS’s supposed to protect against overdischarges and balance… any thoughts?